Heart of Spire/de: Difference between revisions
No edit summary |
No edit summary |
||
| Line 66: | Line 66: | ||
-''Schrei:'' Cortisak kann '''Steingargoylen''' durch Schreien beschwören. | -''Schrei:'' Cortisak kann '''Steingargoylen''' durch Schreien beschwören. | ||
{{{!}} class="wikitable collapsible collapsed" style="width: 100%;" | {{{!}} class="wikitable collapsible collapsed" style="width: 100%;" | ||
! style="background-color: {{ | ! style="background-color: {{ColorSelDE|Village|5}}; " class="textfloat" colspan="12" | '''Taktiken''' | ||
{{!}}- | {{!}}- | ||
{{!}} | {{!}} Dieses Kartenstück ist eine der schwersten Kartenstücke im Spiel überhaupt. Dabei gibt es viele Methoden Cortisak zu fangen: | ||
==== | ====Empfohlene Methode==== | ||
Nachdem Cortisak etwas nach unten geflogen ist (nachdem er etwas geflogen ist), attackiert man die Harpune, die sich unter ihm auf den Kampffeld befindet. Wenn man ihn bis zu 4 mal mit den Harpunen trifft, dann fällt Cortisak auf den Boden, dabei besitzt er eine kleinere Schadensreduktion und man kann Skills auf ihn spammen. Dabei sollte man vorsichtig sein, da die Harpunen dir oder deinen Teammitglieder schaden zufügen können.<br/> | |||
* | *Cortisak bekommt so mehr als den dreifachen Schaden, als wenn man ihn in der Luft attackiert. Sobald er sich für das Losfliegen wieder bereit macht ist die verringerte Schadenreduktion weg. | ||
* | *Am Anfang des Kampfes fliegt Cortisak über den Bildschrim zwischen den mittleren Harpunen und bewegt sich dort nicht. Wenn man beide Harpunen zur richtigen Zeit abschießt, dann kann man ihn direkt auf den Boden schmeißen. | ||
** | **Man kann den Bewegungsstop an seinen Icon sehen, während er außerhalb des Bildschirms ist. | ||
** | **Für das erste Runterschmeißen von Cortisak braucht man immer nur eine Harpune, bei den nächsten Versuchen brauch man zwischen 2 bis 4 Harpunen, damit er auf den Boden landet. | ||
==== | ====Zweite Methode==== | ||
Elsword's "[[Parry]]" Active Skill can open Cutty Sark to combos when he swoops into the battlefield.<br/> | Elsword's "[[Parry]]" Active Skill can open Cutty Sark to combos when he swoops into the battlefield.<br/> | ||
Skills like [[Binding Circle]] and the Light Element Petrifying can help give time for attacking.<br/> | Skills like [[Binding Circle]] and the Light Element Petrifying can help give time for attacking.<br/> | ||
| Line 83: | Line 83: | ||
**Cutty Sark only takes full damage when freshly knocked down with a harpoon. | **Cutty Sark only takes full damage when freshly knocked down with a harpoon. | ||
==== | ====Dritte Methode==== | ||
Go to the far right or left (depending on where Cutty Sark is) of the platform and wait for Cutty Sark to come underneath one of the harpoons. Once he is underneath one of them you run over to that harpoon and hit it. After the harpoon launches, you stay underneath Cutty Sark and see which way he is facing so that you will know which way he is going to attack (if he starts flying backwards while facing the left you just simply dash over to the right side to dodge his attack) | Go to the far right or left (depending on where Cutty Sark is) of the platform and wait for Cutty Sark to come underneath one of the harpoons. Once he is underneath one of them you run over to that harpoon and hit it. After the harpoon launches, you stay underneath Cutty Sark and see which way he is facing so that you will know which way he is going to attack (if he starts flying backwards while facing the left you just simply dash over to the right side to dodge his attack) | ||
* Note that this could get difficult if Cutty Sark is flying between you and the harpoon (meaning that you can barely reach the harpoon to hit him in time before he gets ready for another attack) | * Note that this could get difficult if Cutty Sark is flying between you and the harpoon (meaning that you can barely reach the harpoon to hit him in time before he gets ready for another attack) | ||
==== | ====Vierte Method==== | ||
Unfortunately lag destroys the ability to finish off Cutty quickly. If your party decides not to use the harpoons (or particularly aren't using them correctly), this is also covered by this method, albeit requiring a higher skill output than usual. Commence by luring Cutty down (should be automatic if your party cannot aim the arrows correctly for whatever reason), then proceed to wait until he lunges. Right at the moment he lunges, hit him. The safe approaches are "[[Armageddon Blade]]," "[[Maelstrom Rage]]," "[[Binding Circle]]"; any form of delay with a random hit (or can be used to stall enough for a person to hit Cutty). Now that Cutty is in one place, you'll have to rely entirely on using the highest damaging skills first so as to not be interrupted by random super armor activation, and to bypass the high damage reduction he has. With some luck, you can push him to a harpoon and proceed to demolish him. | Unfortunately lag destroys the ability to finish off Cutty quickly. If your party decides not to use the harpoons (or particularly aren't using them correctly), this is also covered by this method, albeit requiring a higher skill output than usual. Commence by luring Cutty down (should be automatic if your party cannot aim the arrows correctly for whatever reason), then proceed to wait until he lunges. Right at the moment he lunges, hit him. The safe approaches are "[[Armageddon Blade]]," "[[Maelstrom Rage]]," "[[Binding Circle]]"; any form of delay with a random hit (or can be used to stall enough for a person to hit Cutty). Now that Cutty is in one place, you'll have to rely entirely on using the highest damaging skills first so as to not be interrupted by random super armor activation, and to bypass the high damage reduction he has. With some luck, you can push him to a harpoon and proceed to demolish him. | ||
*If the lag is high enough to deny you that, keep using skills. If he survives afterward (which he most likely will), proceed to use any air tactics if you can reach him, otherwise repeat this method. | *If the lag is high enough to deny you that, keep using skills. If he survives afterward (which he most likely will), proceed to use any air tactics if you can reach him, otherwise repeat this method. | ||
Revision as of 15:19, 20 April 2015

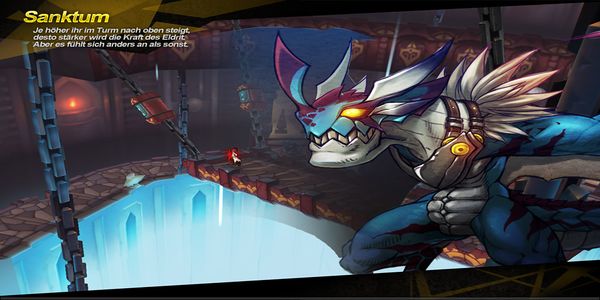
Sanktum
| “ | Je höher ihr im Turm nach oben steigt, desto stärker wird die Kraft des Eldrit. Aber es fühlt sich anders an als sonst.
|
” |
| Beschreibung: |
|---|
| Zentraler Teil des Turms des Opfertempels. Man kann die Energie des Dunklen Eldrit hier deutlich spüren. |

|
|
| Karte: |
|---|
| Zwischenbosse: | ||||||
|---|---|---|---|---|---|---|
{{
|
| Hindernisse: | ||||||||
|---|---|---|---|---|---|---|---|---|
{{
|
| Boss | ||||||||
|---|---|---|---|---|---|---|---|---|
{{
|
}}|}}
| Boss Drops | BGM |
|---|---|
| {{ }} | {{
DungeonBoss}} |
| Trivia |
|---|
| Dungeons | ||||||||||||
|---|---|---|---|---|---|---|---|---|---|---|---|---|
|
| Jagdfelder | ||||||||||||||||||||||||||
|---|---|---|---|---|---|---|---|---|---|---|---|---|---|---|---|---|---|---|---|---|---|---|---|---|---|---|
|


