Henir's Time and Space (Version 4)
From Elwiki

Henir's Time and Space

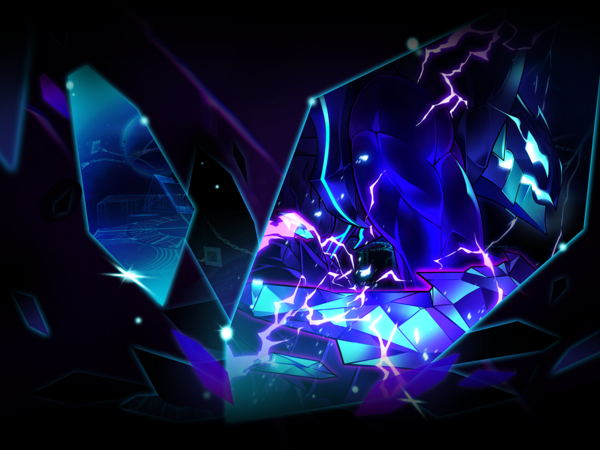
Time and Space is in complete chaos. A dangerous trial awaits us...

Description
{{

A phenomenon called Henir's Time and Space lies in a temple called Seven Tower, where sages were known to dwell. The land it stands on was discovered in the olden days. This discovery brought about the emergence of magical skills, and led to the temple being built. Legend has it that the god Henir endured Ragnarok, and afterwards created a place where there is no limitation of time and space. Here, he is able to see the rise and fall of the world. Should you reach this place, by Henir's force, you are bound to face the enemies you have met in the past and those you are destined to meet in the future.

It has been said that a person overcoming this test can meet Henir and acquire an immense power. However, as the power of El began to decrease, the entrance of Henir's Time and Space has suddenly appeared in several places. Elsword and the rest of the gang decide to enter this mysterious dungeon in attempts of gaining the legendary power and using it to take back the missing El.

}}
Recommended Level
99
Required Combat Power
150,000
Entry Requirements
{{
  • Can only enter alone.
  • Must complete Normal Mode before Challenge Mode becomes available.
}}
Details
{{Originally Ymir's Time and Space, William's Time and Space.

Dimensional time and space where a genius magician is serving an eternal punishment.
This dungeon mode allows you to fight the major bosses in Elsword in a boss rush style.
Through this mode, you can collect Time and Space Fragments, which you can exchange at Glave for special items and Force skills.
Henir's Time and Space may be attempted as much as the player wishes, but rewards will only be given once per week.

Rules

  • Consumable(s) : Dungeon Specific Consumables
    • 10x Advanced Healing Potion (250,000 HP Recovery, 1 Second Cooldown)
    • 10x Advanced Mana Potion (300 MP Recovery, 1 Second Cooldown)
    • 3x Water Orbs (30 Second Cooldown)
    • 3x Wind Orbs (30 Second Cooldown)
  • Resurrection(s) : Not Allowed
  • Mounts: Disabled
  • Titles disabled: Ruler of Dimensions, Invader of Dimensions, God of Dimensions
  • Does not give ED, EXP, and does not consume Stamina.

}}

Normal Mode
{{

Consists of 20 consecutive stages. Bosses are selected randomly in any order each week.

Stage Boss Group Stage Boss Group Stage Boss Group Stage Boss Group
Stage 1 Normal & Challenge Stage 6 Normal & Challenge Stage 11 Normal & Challenge Stage 16 Normal & Challenge
Stage 2 Stage 7 Stage 12 Stage 17
Stage 3 Stage 8 Stage 13 Stage 18
Stage 4 Stage 9 Stage 14 Stage 19
Stage 5 Stage 10 Stage 15 Stage 20 Obezaar
}}
Challenge Mode
{{

Consists of 6 consecutive stages. Bosses are selected randomly in any order each week.

Stage Boss Group Stage Boss Group
Stage 1 Challenge Stage 4 Challenge
Stage 2 Stage 5
Stage 3 Stage 6 Obezaar

}}

  • WARNING: It's HEAVILY recommended to use either Eclipse or Forginay's Fruit Titles for the sake of survival and Drain/Obtenebration as emergency utilities, its very possible you'll get one-shotted at some point.
Stages
{{
Normal Group Challenge Group
  • Berauk (x1), Kayak the Shaman (x1), Dark Barauk (x1)
  • Wally No. 8 MK2 (x1), Crow Rider (x2)
  • Ancient Nasod Princess Apple (x1), Code: Q-Proto_00 (x1)
  • Durahan Knight (x1), Teach the Tyrant (x1)
  • Wise Dutor (x1), Proxy the Nimble (x1), Assaulter Crash (x1)
  • Uno Hound (x1), Chloe (x1)
  • Spriggan (x2)
  • Stealthy Morfos (x1), Mcgard the Blitzkrieg (x1), Polka (x1), Invincible Vardon (x1), Sullen Joaquin (x1)
  • Victor (x2)
  • Berthe (x2)
  • Shadow Master (x2)
  • Magmanta (x2)
  • Ran (x2)
  • Shadow Stigner (x1), Bizarre Conrad (x1), Fallen Chloe (x1), Giant Hammer Bobosse (x1)
  • Giant Waldo (x2)
  • Chieftain Trockta (x2)
  • Great Battle Chief Karu (x2)
  • Karis (x2)
  • Fully Grown Karis (x1)
  • Fierce Stone Axe Bootru (x1), Dark Wing Okypete (x1), Battle Chief Tuadin (x1), Battle Chief Tariq - Tariq (x1), Succubus : Erilot (x1)
  • Dryad Kenta (x2)
  • The Steel Anvil Sdeing (x2)
  • Traitor Ignia (x1), Steel Lava Fighter (x2), Steel Lava Berserker (x1), Berserker Armageddon (x3)
  • Bound Ifritan (x2)
  • Demon General Scar (x2)
  • Entranced Demon Jin (x1), Enslaved Demon In (x1)
  • Science Dekal (x1), Dekal (x1)
  • CODE-Maya (x2)
  • Herna Shield (x1), Herna Orb (x1)
  • Herbaon (x1)
  • Kayak the Shadow Shaman (x1), Ancient Bone Dragon (x1)
  • Alterasia Type-H (x1)
  • Joaquin's Hallucination (x1)
  • Fallen Guardian: Helputt (x1)
  • Enraged Manifestation (x1)
  • Form of Mutated Demonic Energy (x1)
  • El's Aspiration (x1)
  • Skin Splitter (x1)
  • Hennon (x1)
  • Chaos Leviathan (x1)
  • Sentinel Guardians (x1)
  • Dark Agate (x1)
}}
Boss
{{ {{
Monster Image Boss Description Boss Moves
Obezaar - A being of Henir that was locked away within the confines of Henir's Time And Space, broken free from its shackles.

Obezaar

  • Super Armor: Obezaar will be in perpetual Super Armor.
  • Teleport: Warp anywhere on the map at will, mostly used to warp in front of the player.
  • Backstep: Quickly makes a short hop forwards while turning backwards, mostly used when the player is behind.
  • Uppercut: Claws at the player in front, causing a small shockwave that launches, used if the player is at melee-range.
  • Thunder Dash: Winds up in place before dashing forward cloaked in electricity, carrying the player with it.
  • Illusion Burst: Dashes through the player, causing electric blasts to occur in its wake, followed by EMP Burst.
    • EMP Burst: Jumps into the air before causing a massive radial electric blast that drains 200 MP when hit.
  • Shock Drain: Glares at the player before warping directly in front and causing an electric blast that drains 18 MP per hit.
    • Despite the look of the electricity, the hitbox is limited to Obezaar's size.
  • Maximum Charge: Jumps into the background and cloaks itself in an electric barrier while charging up energy. Creates two Obezaar copies that can perform any of the above attacks. The right clone is invincible until you defeat the one that spawns on the left. They have a 30(Normal)/45(Challenge) seconds duration.
    • Is performed when approximate 30(Normal)/20(Challenge) bars are depleted after being exhausted .
      • This means the boss will always use the skill at least one time after first meet the boss, which is roughly at 70(Normal)/80(Challenge) bars and so on after the boss end its exhausted state.
    • If the player defeats both clones in time, Obezaar will be rendered exhausted for a handful of seconds.
    • If the player fails to defeat both in time, Obezaar will enter an EX phase for roughly a minute before going back to normal.

Obezaar (EX)

  • Teleport/Backstep EX: Executed faster and can attack quicker after use.
  • Electric Lariat: Wind up in place and performs a forward spinning move after charging up, doesn't have hitstun unless contact is made.
  • Uppercut EX: Has a second, delayed hit afterwards with high damage.
  • EMP Burst EX: Pulls the player inwards and the build-up before the blast will cause damage and drain 12MP per hit.
  • Thunder Dash EX: Slams the ground afterwards to cause additional lightning blasts.
  • Chaos Dive: Jumps into the air and, in a corner, creates lightning copies of itself that will crash into the ground shortly, aiming at the ground below the player, causing massive sparks of electricity on their way down, before diving into the ground itself.
    • Can be dodged by going below the clones and walking towards the opposite end at a moderate speed, halting for a moment, then moving away a little before Obezaar himself dives.
    • Alternatively, some characters can continuously use Skills to remain invulnerable for the whole attack, or can go to the opposite side and stall in mid-air until its over.
Obezaar (Phase 2) - When fighting in Challenge Mode, once Obezaar's HP is depleted to 50 HP bars, it will enter its second form. Additional platforms will appear on the stage.

CHALLENGE MODE ONLY

Obezaar will possess the same moveset as Obezaar (EX), with the exclusion of Maximum Charge and the addition of Chaos Dive (whether EX phase is activated or not) and a few new moves.

  • Lightning Chaos: Warps to the center while emitting a stage-wide debuff that prevents the player from attacking. While in the center, creates numerous lightning copies in sets of 2 per attack that dash around the stage dealing damage and draining 200 MP if the player comes into contact with them.
    • If Obezaar was prevented from going EX, Obezaar will fall exhausted afterwards.
    • If Obezaar was allowed to go EX in Phase 1, he won't exhaust, and will activate the move below.
    • Can be easily avoided by going to the far left or far right of the arena.
    • Can be performed randomly, however will always be performed when its HP hits 40x and 20x.
  • Thunderstorm: Periodically a pillar of light will target the player, shooting a lightning bolt afterwards with guaranteed death damage that leaves sparks that briefly linger, will happen 6 times. Obezaar will be attacking you in the meantime.
    • You can bait the lightning into a high platform to lessen the risk of being cornered, Also be VERY attentive to what Obezaar is doing, as he can bodyblock you or use EMP Burst EX to force you into a lightning bolt if you aren't paying attention.
    • He can also use Chaos Dive during it, and avoiding both is insanely hard, hopefully you have a lot of MP and a Skill with insanely lengthy I-frames to avoid, such as a Hyperactive.

}}

}}
Dialogue
  • Elsword: You know, this is great training! Come on, you guys, show me whatcha got!
  • Aisha: Ooh, that was close. This is getting risky!
  • Rena: Yes! A wholehearted rush to conquer time and space!
  • Raven: Hmph, Ghosts... I will break you as many times as you want me to.
  • Eve: In the ancient times, there were more spaces of more severe ordeals. This is any easy job.
  • Chung: I think this will be a good place to practice! Let's challenge them again!
  • Ara: It is a good place to train martial arts... I can challenge my own limitations.
  • Elesis: This training is also hard for me too.. But I will try to take it as a challenge!
  • Add: Oh.. the crack I fell into was just a part of a larger opening.. Curious, it stimulates my research instincts! Huhu!
  • Lu/Ciel: Hmm. I sense a stronger presence. Not bad...
  • Rose: What a cruel place. This is more tiring than the training grounds for the royal guards.
  • Ain: (... ... ... ...)
  • Laby: It's weird... Laby has been to somewhere similar to this place before...
  • Noah: Is this where encounter past enemies? No matter what the reason, I'm used to this.
Reward
Normal Mode
{{
Stage Reward Stage Reward Stage Reward Stage Reward
Stage 1 Time and Space Fragment Per stage x1 Stage 7 Time and Space Fragment Per stage x3 Stage 13 Time and Space Fragment Per stage x5 Stage 19 Time and Space Fragment Per stage x7
Stage 2 Stage 8 Stage 14 Stage 20
Stage 3 Stage 9 Stage 15
Stage 4 Time and Space Fragment Per stage x2 Stage 10 Time and Space Fragment Per stage x4 Stage 16 Time and Space Fragment Per stage x6
Stage 5 Stage 11 Stage 17
Stage 6 Stage 12 Stage 18
}}
Challenge Mode
{{
Stage Boss Group Stage Boss Group
Stage 1 Time and Space Fragment Per stage x10 Stage 4 Time and Space Fragment x12
Stage 2 Stage 5 Time and Space Fragment x15
Stage 3 Stage 6 Time and Space Fragment x20
}}
Gallery
Videos
{{
Old Animated Video
}}
Alternative Names
{{
Server Name Translation
South Korea 헤니르의 시공 Henir's Time and Space
Taiwan (Traditional Chinese) 赫尼爾時空 Henir's Time and Space
China (Simplified Chinese) 赫尼尔时空 Henir's Time and Space
Germany Henirs Raumzeit Henir's Space-Time
Spain Espacio-tiempo de Henir Henir's Space-Time
France Espace-temps d'Henir Henir's Space-Time
Italy Spazio Tempo di Henir Henir's Space-Time
Poland Czasoprzestrzeń Henir'a Henir's Time-Space
United Kingdom Henir's Time-Space Continuum
Brazil Tempo e Espaço de Henir Henir's Time and Space
}}


  • Other
  • Region 1~6
  • Region 7~12
  • Region 13~18
  • Region 19~20
  • Laby
  • Noah
  • Lithia
  • Miscellaneous