Resiam Outskirts/it: Difference between revisions
No edit summary |
No edit summary |
||
| Line 7: | Line 7: | ||
{| cellspacing="2" cellpadding="5" rules="all" style="margin:0.5em 0.5em 0.5em 0.5em; empty-cells:show;" | {| cellspacing="2" cellpadding="5" rules="all" style="margin:0.5em 0.5em 0.5em 0.5em; empty-cells:show;" | ||
|- | |- | ||
|valign="top" width="100%" align="center" style="border:1px solid; border-color:#000000; background: # | |valign="top" width="100%" align="center" style="border:1px solid; border-color:#000000; background: #007be4; color:#FFFFFF;" colspan="12"| '''Description:''' | ||
|- | |- | ||
|valign="top" width="100%" align="center" style="border:1px solid; border-color:#000000; background: #007be4; color:#FFFFFF;" colspan="12"| ''' | |width="100%" colspan="12" align="center" style="border:1px solid; border-color:#000000; font-size:1em; line-height:1.5em;" valign="top"| | ||
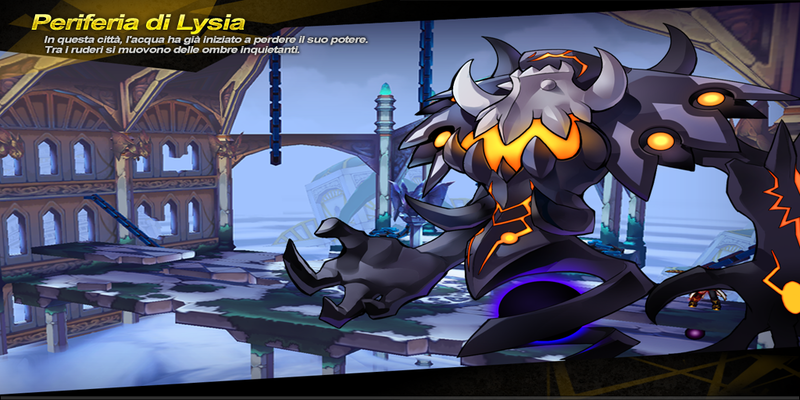
A suburban area that connects Hamel and Resiam together. The closer you get to Resiam, the more you will notice the forces of evil lurking around. | |||
|- | |||
|rowspan="4" | [[File:periferiadilysia.png|800px]] | |||
|align="center" style="border:1px solid; border-color:#000000; background: #007be4; color:#FFFFFF;" colspan="12" | '''Recommended Level:''' | |||
|- | |||
| style="border:1px solid; border-color:#000000;" align="center" colspan="12" | 52-54 | |||
|- | |||
| align="center" style="border:1px solid; border-color:#000000; background: #007be4; color:#FFFFFF;" colspan="12" | '''Appropriate Item Level:''' | |||
|- | |||
| style="border:1px solid; border-color:#000000;" align="center" colspan="12" | | |||
42 | |||
|- | |||
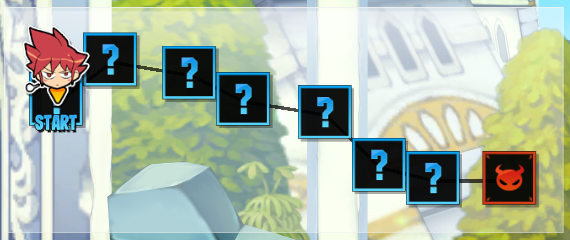
|valign="top" width="100%" align="center" style="border:1px solid; border-color:#000000; background: #007be4; color:#FFFFFF;" colspan="12"| '''Dungeon Layout:''' | |||
|- | |- | ||
|width="100%" colspan="12" align="center" style="border:1px solid; border-color:#000000; font-size:1em; line-height:1.5em;" valign="top"| | |width="100%" colspan="12" align="center" style="border:1px solid; border-color:#000000; font-size:1em; line-height:1.5em;" valign="top"| | ||
{{tabs|name=-|tab1=Normal|contents1=[[Image:Hamel1.png]] |tab2=Hard|contents2=[[Image:Hamel1.png]] |tab3=Very Hard|contents3=[[Image:Resiam Outskirts Map VH.png]]}} | |||
|- | |||
|valign="top" align="center" style="border:1px solid; border-color:#000000; background: #007be4; color:#FFFFFF;" width="100%" colspan="12"| '''Mobs:''' | |||
|- | |||
| colspan="12" style="border:1px solid; border-color:#000000;" valign="top" width="100%" | | |||
*[[File:Hamel-shadow-walker.jpg|60px]] | |||
'''Shadow Walker''' - This is the basic Shadow monster. They attack with their claws and will sometimes attack back when getting up after being knocked down. | |||
*[[File:Shadow_Charger.jpg|60px]] | |||
'''Shadow Charger''' - This Shadow monster attacks by running forward, damaging any players within its path. They can also grab onto any players, immobilizing them. You can escape from their grasp by rapidly tapping the left and right arrow keys. | |||
*[[File:Shadow_Defender.jpg|60px]] | |||
'''Shadow Defender''' - This Shadow monster will attack launching spears towards you. When a player gets hit by the spears, they will be Cursed and will gradually lose mana over time. Mana will be drained faster when the player is immobilized by a Shadow Charger. They can also emit a Darkness aura which will raise the defense of all monsters within range. | |||
*[[File:Laguz_Stricken_City.jpg|60px]] | |||
'''Laguz''' - This Water Spirit attacks by releasing 3 bubbles in front of them and popping them, which will damage and inflict [[Status Effects|Frostbite]]. They can also release a bubble aura to encase any players in range in a bubble. After killing one, they will trap any players close to them in a bubble. When trapped in a bubble, you will not be able to move. | |||
*[[File:Hamel-shadow-sniper.jpg|60px]] | |||
'''Shadow Sniper''' - This Shadow monster attacks by slowly charging up their laser and then firing it. The laser will travel across the entire stage. | |||
|- | |||
|valign="top" align="center" style="border:1px solid; border-color:#000000; background: #007be4; color:#FFFFFF;" width="100%" colspan="12"| '''Mini Boss:''' | |||
|- | |- | ||
| | | colspan="12" style="border:1px solid; border-color:#000000;" valign="top" width="100%" | | ||
*[[File:Shadow_Stinger.jpg|60px]] | |||
'''Shadow Stinger''' - A deadlier creature of the shadows. Has spikes on it. | |||
<br> | |||
'''Moves:''' | |||
<br> | |||
-''Forward Spikes:'' Jabs you with a few spikes when you stand in front of it. Hits multiple times and pushes backwards for some distance | |||
<br> | |||
-''Spike Ball:'' Extends all the spikes on it, impaling anything nearby. Induces KD. | |||
<br> | |||
-''Spike Fall:'' Jumps into the air and turns upside down as it's turning its head into a giant spike before making a sharp fall, tends to do this to attack players through platforms. Induces KD. | |||
<br> | |||
-''Crystal Stinger:'' Brings forth a crystal in it's chest to poke you with it. Does moderate damage. Induces KD. | |||
'''Note:''' | |||
<br> | |||
-Appears only on Hard and Very Hard mode. | |||
<br> | |||
-Stoics after 30 hits. | |||
<br> | |||
-Has roughly 1,200,000 HP on VH. | |||
|- | |- | ||
| | |valign="top" width="100%" align="center" style="border:1px solid; border-color:#000000; background: #007be4; color:#FFFFFF;" colspan="12"| '''Obstacles:''' | ||
|- | |- | ||
| | |width="100%" colspan="12" style="border:1px solid; border-color:#000000; font-size:1em; line-height:1.5em;" valign="top"| | ||
*[[File:Hamel-black-flower.jpg|60px]] | |||
'''Black Flower''' - Black Flowers are plants located on the bottom of various platforms. They will attack by emitting poison gas downwards to poison any players directly under them. After killing one, they will emit a toxic cloud to poison any players that are close to it. | |||
*[[File:Falling_Building.png|60px]] | |||
'''Falling Building''' - The wreckage of buildings will collapse which can deal damage to adventurers passing by. | |||
|- | |- | ||
|align="center" colspan=" | |valign="top" width="100%" align="center" style="border:1px solid; border-color:#000000; background: #007be4; color:#FFFFFF;" colspan="12"| '''Boss:''' | ||
<br>Shadow | |- | ||
|align="center" colspan=" | |width="100%" colspan="12" style="border:1px solid; border-color:#000000; font-size:1em; line-height:1.5em;" valign="top"| | ||
Shadow | *[[File:Shadow_Master_Head.jpg|60px]] | ||
|align="center" colspan=" | '''Shadow Master''' - The powerful force of darkness and dark energy forms this burst of dark, spiritual manifestation. | ||
<br> | |||
<br> | |||
Slightly similar to Spriggan of [[5-5]]. | |||
<br> | |||
'''Moves:''' | |||
<br> | |||
-''Shadow Swipe:'' He will drag you towards him and then swipes at you. Throws you upwards for some distance.<br> | |||
*You are not able to use any actives or special actives while being pulled by this move. | |||
-''Fire Path:'' Leaves a few dark fireballs in his path every time he moves. Can be easily avoided but deal high damage over time. | |||
<br> | |||
-''Dark Explosion:'' Puts a bomb on you and blows you up as he clenches his fist. Impossible to avoid unless a Skill or Awakening is carried out. | |||
<br> | |||
-''Shadow Link:'' Shadow Master links his dark ball to you, reducing your attack speed.<br> | |||
*This leaves him very open to combos. <br> | |||
*Can be broken by running away from him.<br> | |||
**This may not be convenient as it requires you to run about 2\3 the room's width away from him and have him not follow. | |||
-''Shadow Storm:'' Happens right after his stoic. Summons spheres of darkness that fall from the top of the stage. Can be avoided by standing on the platforms on either side of the stage, or using any move that has invincibility frames. Does moderate damage and has a cooldown of around 30 seconds. He is invincible during this move.<br> | |||
*This skill starts out in cooldown when he spawns so if you put him into stoic in the first ~30 seconds he will stand frozen and do nothing until his stoic ends. | |||
-''Shadow Orbs:'' Usually used right after '''Shadow Storm''', summons shadow orbs that will blow up after a few seconds. Can be destroyed by hitting them (good for [[Hypersonic Stab]]). | |||
|- | |||
|valign="top" align="center" style="border:1px solid; border-color:#000000; background: #007be4; color:#FFFFFF;" width="50%" colspan="6"| '''Boss Drops:''' | |||
|valign="top" align="center" style="border:1px solid; border-color:#000000; background: #007be4; color:#FFFFFF;" width="50%" colspan="6"| '''BGMs:''' | |||
|- | |||
| colspan="6" style="border:1px solid; border-color:#000000;" valign="top" width="50%" | | |||
{{tabs|name=1|tab1=Shadow Sabre|contents1={{:6-1Bdrop1}} |tab2=Shadow Cannon|contents2={{:6-1Bdrop2}}|tab3=Seal of Darkness|contents3={{:6-1Bdrop3}}}} | |||
| colspan="6" style="border:1px solid; border-color:#000000;" valign="top" align="center" width="50%" | | |||
=== Dungeon === | |||
[https://www.youtube.com/watch?v=ocgt405vZnc '''''music041_stage'''''] | |||
=== Boss === | |||
[https://www.youtube.com/watch?v=yb9ZVB627mw '''''music044_boss'''''] | |||
|- | |||
|valign="top" width="100%" align="center" style="border:1px solid; border-color:#000000; background: #007be4; color:#FFFFFF;" colspan="12"| '''Gallery:''' | |||
|- | |||
|width="100%" colspan="12" style="border:1px solid; border-color:#000000; font-size:1em; line-height:1.5em;" valign="top"| | |||
<br><gallery widths=150px heights=150px> | |||
File:ResiamOutskirts.jpg|A suburban area that connects Hamel and Resiam together. | |||
File:Resiambossstage.jpg|The closer you get to Resiam, the more you will notice the forces of evil lurking around. | |||
File:The_Malevolent_Shadow_Master.jpg| | |||
</gallery> | |||
|- | |||
|valign="top" width="100%" align="center" style="border:1px solid; border-color:#000000; background: #007be4; color:#FFFFFF;" colspan="12"| '''Videos:''' | |||
|- | |||
|width="100%" colspan="12" align="center" style="border:1px solid; border-color:#000000; font-size:1em; line-height:1.5em;" valign="top"| | |||
[http://www.youtube.com/watch?v=UVqT2KCgTDA Brun Style] | |||
[http://www.youtube.com/watch?v=XJr068BeTDQ By CryingWolf] | |||
|} | |} | ||
|} | |} | ||
<br> | <br> | ||
{{DungeonsIT}} | {{DungeonsIT}} | ||
Revision as of 11:00, 29 March 2014
| |||||||||||||||||||||||||||||||||||||||||||||||||||||||||||||||||||||||||||||||||||||||||||||||||||||||||||||||||||||||||||||||||||||||||||||||||||||||||||||||||||||||||||||||||||||||||||||||||||||||||||||||||||||||||||||||||||||||||||||||||||||||||||||||||||||||||||||||||||


