Commercial Area 1/it: Difference between revisions
(Created page with "{{Languages|5-4}} {| width="100%" style="font-size:1em; line-height:1.5em;" | valign="top" style="border:2px solid #345bef; border-radius: 1px;"| {| cellspacing="2" cellpad...") |
No edit summary |
||
| Line 1: | Line 1: | ||
{{Languages|5- | {{Languages|5-5}} | ||
| Line 9: | Line 9: | ||
|- | |- | ||
|width="100%" colspan="12" align="center" style="border:1px solid; border-color:#000000; font-size:1em; line-height:1.5em;" valign="top"| | |width="100%" colspan="12" align="center" style="border:1px solid; border-color:#000000; font-size:1em; line-height:1.5em;" valign="top"| | ||
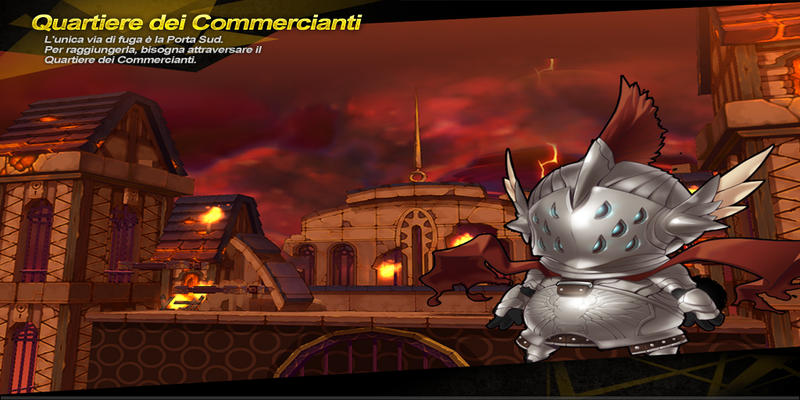
The Commercial Area 1 burns in an intense fire. Demon general Spriggan wields the Demon's tactical plans and a hope for the Velder citizens to route out a safe method of evacuating the crumbling city. Spriggan may look small but within his army lies an unbeatable darkness. | |||
|- | |- | ||
|rowspan="4" | [[File: | |rowspan="4" | [[File:quartieredeicommercianti.png|800px]] | ||
|align="center" style="border:1px solid; border-color:#000000; background: #345bef; color:#FFFFFF;" colspan="12" | '''Recommended Level:''' | |align="center" style="border:1px solid; border-color:#000000; background: #345bef; color:#FFFFFF;" colspan="12" | '''Recommended Level:''' | ||
|- | |- | ||
| style="border:1px solid; border-color:#000000;" align="center" colspan="12" | | | style="border:1px solid; border-color:#000000;" align="center" colspan="12" | 49-51 | ||
|- | |- | ||
| align="center" style="border:1px solid; border-color:#000000; background: #345bef; color:#FFFFFF;" colspan="12" | '''Appropriate Item Level:''' | | align="center" style="border:1px solid; border-color:#000000; background: #345bef; color:#FFFFFF;" colspan="12" | '''Appropriate Item Level:''' | ||
|- | |- | ||
| style="border:1px solid; border-color:#000000;" align="center" colspan="12" | | | style="border:1px solid; border-color:#000000;" align="center" colspan="12" | | ||
39 | |||
|- | |- | ||
|valign="top" width="100%" align="center" style="border:1px solid; border-color:#000000; background: #345bef; color:#FFFFFF;" colspan="12"| '''Dungeon Layout:''' | |valign="top" width="100%" align="center" style="border:1px solid; border-color:#000000; background: #345bef; color:#FFFFFF;" colspan="12"| '''Dungeon Layout:''' | ||
|- | |- | ||
|width="100%" colspan="12" align="center" style="border:1px solid; border-color:#000000; font-size:1em; line-height:1.5em;" valign="top"| | |width="100%" colspan="12" align="center" style="border:1px solid; border-color:#000000; font-size:1em; line-height:1.5em;" valign="top"| | ||
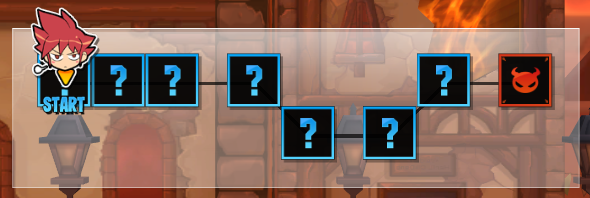
{{tabs|name=-|tab1=Normal|contents1=[[File: | {{tabs|name=-|tab1=Normal|contents1=[[File:Commercial_Area_1_Map_N.png]] |tab2=Hard|contents2=[[File:Commercial_Area_1_Map_HVH.png]] |tab3=Very Hard|contents3=[[File:Commercial_Area_1_Map_HVH.png]]}} | ||
|- | |- | ||
|valign="top" align="center" style="border:1px solid; border-color:#000000; background: #345bef; color:#FFFFFF;" width="100%" colspan="12"| '''Mobs:''' | |valign="top" align="center" style="border:1px solid; border-color:#000000; background: #345bef; color:#FFFFFF;" width="100%" colspan="12"| '''Mobs:''' | ||
| Line 35: | Line 35: | ||
*[[File:Arc_Glitter_Sniper.jpg|60px]] | *[[File:Arc_Glitter_Sniper.jpg|60px]] | ||
'''Arc Glitter Sniper''' - The same as the '''Glitter Archer''' from Feita, except that it has a horn, has grey skin, wears shiny golden armour and wields a flashier bow. It also attacks ALOT more frequently and much faster than usual. | '''Arc Glitter Sniper''' - The same as the '''Glitter Archer''' from Feita, except that it has a horn, has grey skin, wears shiny golden armour and wields a flashier bow. It also attacks ALOT more frequently and much faster than usual. | ||
*[[File:Arc_Glitter_Alchemist.jpg|60px]] | *[[File:Arc_Glitter_Alchemist.jpg|60px]] | ||
'''Arc Glitter Alchemist''' - A Glitter who wears red robes and a cap. Can throw a variety of chemicals that cause poison, burning, constant mana drop, unable to move ailments respectively. Can also utilize a combustion move that does substantial damage (gunpowerder-like dust followed by explosion). | '''Arc Glitter Alchemist''' - A Glitter who wears red robes and a cap. Can throw a variety of chemicals that cause poison, burning, constant mana drop, unable to move ailments respectively. Can also utilize a combustion move that does substantial damage (gunpowerder-like dust followed by explosion). | ||
*[[File:Arc_Glitter_Assassin.jpg|60px]] | |||
'''Arc Glitter Assassin''' - A Glitter Soldier garbed in a black outfit. This assassin utilises quick, short movements and will roll away from you whenever it attacks you. It can also drop poisonous bombs when it rolls away from you after being knocked down. | |||
*[[File:5-1-5.jpg|60px]] | |||
'''Glitter Commander''' - This is a muscular and taller version of a Glitter. He can get the Glitter Soldiers into formations that can be deadly at times. He has a dagger, but only uses it when his army is dead. | |||
*[[File:Cockatigle.jpg|60px]] | *[[File:Cockatigle.jpg|60px]] | ||
'''Cockatrigle''' - A big, yellow chicken-like animal that utilises quick pecking moves and super-armoured laser attacks which can cause a very slight burning ailment. | '''Cockatrigle''' - A big, yellow chicken-like animal that utilises quick pecking moves and super-armoured laser attacks which can cause a very slight burning ailment. | ||
*[[File: | *[[File:Dark_Elf_Sentinel.jpg|60px]] | ||
''' | '''Dark Elf Sentinel''' - A skimpily dressed elf with dark skin. This elf may seem harmless at first, but its avoidability is so consequential it can interrupt many of your combos. It is thus advisable to have at least 10% accuracy to handle these elves. These elves utilise quick arrow shots and occasionally stronger arrow shots at you and can use their knives at close combat. They become invincible whenever they somersault away from you. | ||
*[[File:Kenaz.jpg|60px]] | *[[File:Kenaz.jpg|60px]] | ||
'''Kenaz''' - These fairies utilise fire based magic attacks that can burn you. When killed, it will self-destruct as a last resort to injure you. | '''Kenaz''' - These fairies utilise fire based magic attacks that can burn you. When killed, it will self-destruct as a last resort to injure you. | ||
*[[File:Wyvern.jpg|60px]] | *[[File:Wyvern.jpg|60px]] | ||
'''Wyvern''' - A yellow wyvern with brown spots over its body. Similar to in attacks to its Feita Counterparts, but releases mini-meteors from its mouth instead of high-frequency waves. It is inadvisable to stand in front of a wyvern when he vomits meteors as it can juggle you, dealing very substantial damage. | '''Wyvern''' - A yellow wyvern with brown spots over its body. Similar to in attacks to its Feita Counterparts, but releases mini-meteors from its mouth instead of high-frequency waves. It is inadvisable to stand in front of a wyvern when he vomits meteors as it can juggle you, dealing very substantial damage. | ||
*[[File:Blood_Eater_Prosperity_Road.jpg|60px]] | |||
'''Blood Eater''' - Similar to the Mana Eater in Feita, except that it eats 50% of your current HP. You can murder it to re-obtain 1 50% HP refill. Be wise to use it as HP refilling mechanism. | |||
|- | |- | ||
|valign="top" align="center" style="border:1px solid; border-color:#000000; background: #345bef; color:#FFFFFF;" width="100%" colspan="12"| '''Mini Boss:''' | |valign="top" align="center" style="border:1px solid; border-color:#000000; background: #345bef; color:#FFFFFF;" width="100%" colspan="12"| '''Mini Boss:''' | ||
|- | |- | ||
| colspan="12" style="border:1px solid; border-color:#000000;" valign="top" width="100%" | | | colspan="12" style="border:1px solid; border-color:#000000;" valign="top" width="100%" | | ||
*[[File: | *[[File:Sullen_Joaquin.jpg|60px]] | ||
''' | '''Sullen Joaquin''' - A giant version of the Arc Glitter Alchemist but wears a Bio-hazard suit. | ||
<br> | <br> | ||
'''Moves:''' | '''Moves:''' | ||
<br> | <br> | ||
-'' | -''Toss Chemicals:'' The Pyromaniac Alchemist tosses all varieties of potions (that the normal Velder Alchemist tosses) that cover a large area at one time. | ||
<br> | |||
-''Heal Chemical:'' The Pyromaniac Alchemist drops some life-powder that gives a certain large area recovery rate. (Yourself and Enemies) | |||
<br> | <br> | ||
-'' | -''Combustion Move:'' The Pyromaniac Alchemist tosses black powder in the air and causes it to explode. | ||
<br> | <br> | ||
- | -''Pyromania Mode:'' The Pyromaniac starts running around, spreading gaseous kerosene. He then laughs crazily and causes where the kerosene spread to explode. | ||
|- | |- | ||
|valign="top" width="100%" align="center" style="border:1px solid; border-color:#000000; background: #345bef; color:#FFFFFF;" colspan="12"| '''Obstacles:''' | |valign="top" width="100%" align="center" style="border:1px solid; border-color:#000000; background: #345bef; color:#FFFFFF;" colspan="12"| '''Obstacles:''' | ||
|- | |- | ||
|width="100%" colspan="12" style="border:1px solid; border-color:#000000; font-size:1em; line-height:1.5em;" valign="top"| | |width="100%" colspan="12" style="border:1px solid; border-color:#000000; font-size:1em; line-height:1.5em;" valign="top"| | ||
*[[File:Dunno.png|60px]] | *[[File:Dunno.png|60px]] | ||
''' | '''Unstable Ground''' - Due to the demon invasion various areas are structurally unsound and will collapse as at moment's notice revealing large pitfalls. | ||
*[[File:Dunno.png|60px]] | *[[File:Dunno.png|60px]] | ||
'''Barricades''' - These barricades merely block you way. | '''Barricades''' - These barricades merely block you way. | ||
| Line 79: | Line 79: | ||
|- | |- | ||
|width="100%" colspan="12" style="border:1px solid; border-color:#000000; font-size:1em; line-height:1.5em;" valign="top"| | |width="100%" colspan="12" style="border:1px solid; border-color:#000000; font-size:1em; line-height:1.5em;" valign="top"| | ||
*[[File: | *[[File:Spriggan.jpg|60px]] | ||
''' | '''Spriggan''' - Elrios' Ultimate Test. Looks like a cute and chubby boy, but something seems to be hidden within that suit of armour... | ||
<br> | <br> | ||
'''Moves:''' | '''Moves:''' | ||
<br> | <br> | ||
-'' | -''Shadow Sword:'' (SUPER ARMOURED) Does a series of 3 slashes, ending with a dark mega slash. | ||
<br> | <br> | ||
-'' | -''Shadow Trap:'' Spriggan hops on the ground twice and creates a shadow trap where he stands. Those caught in it will be unable to move or attack until the hole disappears. Similar to [[Entangle]]. | ||
<br> | <br> | ||
-'' | -''Shadow Embrace:'' During the battle, black holes of dark energy will appear in the battlefield, accompanied with a low-key whistling sound. If the holes are not destroyed in time, they will expand into much larger portals. When Spriggan enters the range of these portals, his true demonic shadow form will be unleashed from the constrictions of his armor, announcing his arrival with eruptive bursts of dark energy around the battlefield. | ||
'''Note:''' | '''Note:''' | ||
-If you died after he summoned black holes, reviving will destroy all black holes on the field. | |||
*[[File:Spriggan_Shadow.jpg|60px]] | |||
'''Spriggan (Shadow Mode)''' - This is the true form of Spriggan. | |||
<br> | |||
'''Moves:''' | |||
<br> | |||
-''Shadow Swipe:'' Slashes at you upwards, throwing you away from the '''Shadow Embrace''' it is under. Can be followed by tons of '''Dark Energy Splashes''' | |||
<br> | |||
-''Dark Energy Slash:'' Spriggan's shadow swings his arm upwards and unleashes a violent eruption of dark energy beneath your feet, dealing substantial damage. | |||
<br> | <br> | ||
- | -''Black Hole:'' Spriggan's shadow summons a black hole with his hand, sucking in everyone on the battlefield. It deals continuous hits of damage and ends with a powerful explosion. You will NOT survive this move. If he catches you, quickly mana break to avoid death. | ||
|- | |- | ||
|valign="top" align="center" style="border:1px solid; border-color:#000000; background: #345bef; color:#FFFFFF;" width="50%" colspan="6"| '''Boss Drops:''' | |valign="top" align="center" style="border:1px solid; border-color:#000000; background: #345bef; color:#FFFFFF;" width="50%" colspan="6"| '''Boss Drops:''' | ||
| Line 113: | Line 107: | ||
|- | |- | ||
| colspan="6" style="border:1px solid; border-color:#000000;" valign="top" width="50%" | | | colspan="6" style="border:1px solid; border-color:#000000;" valign="top" width="50%" | | ||
{{tabs|name=1|tab1= | {{tabs|name=1|tab1=Alchemy Commander|contents1={{:5-5Bdrop1}} |tab2=Spriggan Feather Skull|contents2={{:5-5Bdrop2}}}} | ||
| colspan="6" style="border:1px solid; border-color:#000000;" valign="top" align="center" width="50%" | | | colspan="6" style="border:1px solid; border-color:#000000;" valign="top" align="center" width="50%" | | ||
=== Dungeon === | === Dungeon === | ||
[https://www.youtube.com/watch?v= | [https://www.youtube.com/watch?v=HXBRbRbkzfs '''''music038_stage'''''] | ||
=== Boss === | === Boss === | ||
[http://www.youtube.com/watch?v= | [http://www.youtube.com/watch?v=yGiKGl8fS9o '''''music027_boss'''''] | ||
|} | |} | ||
|} | |} | ||
<br> | <br> | ||
{{DungeonsIT}} | {{DungeonsIT}} | ||
Revision as of 10:54, 29 March 2014
| |||||||||||||||||||||||||||||||||||||||||||||||||||||||||||||||||||||||||||||||||||||||||||||||||||||||||||||||||||||||||||||||||||||||||||||||||||||||||||||||||||||||||||||||||||||||||||||||||||||||||||||||||||||||||||||||||||


