Nightmare's Crib: Difference between revisions
From Elwiki
m (Text replacement - "Abyssal Core" to "Heart Core") |
(Finished phase 1!) |
||
| (4 intermediate revisions by 3 users not shown) | |||
| Line 1: | Line 1: | ||
{{Languages|Nightmare's Crib}} | {{Languages|Nightmare's Crib}} | ||
{{ | {{RaidPage | ||
| Orient=4 | | Orient=4 | ||
| Color={{ColorSel|Village|19}} | | Color={{ColorSel|Village|19}} | ||
| Line 8: | Line 7: | ||
| BigPic=19-3new.png | | BigPic=19-3new.png | ||
| DunName=Nightmare's Crib | | DunName=Nightmare's Crib | ||
| Quotation=''' | | Quotation='''The nest swallowed by Abyss. It brings comfort despite its deadliness. A primordial land, the unfortunate helper falls into a deep slumber.''' | ||
| Description=Move forward following the trace left by the guide, and meet an unfamiliar look of a familiar face. | | Description=Move forward following the trace left by the guide, and meet an unfamiliar look of a familiar face. | ||
| LvNeed=99 | | LvNeed=99 | ||
| LvFit=5000000 | | LvFit=5000000 | ||
| LvFitStory=2500000 | |||
| XEntryReq=<span style="display:none">{{</span> | | XEntryReq=<span style="display:none">{{</span> | ||
| Line 19: | Line 19: | ||
====Demon Realm==== | ====Demon Realm==== | ||
*The El's power does not reach into this realm, Attack and HP will be reduced by 90%. Enemies will have a 20% chance to resist your critical hits. | *The El's power does not reach into this realm, Attack and HP will be reduced by 90%. Enemies will have a 20% chance to resist your critical hits. | ||
====Boss Defenses==== | |||
{| class="wikitable" | |||
! Boss Name !! Defense (Raw) !! Defense (Percentage) | |||
|- | |||
| '''Dream Eater (Phase 1)''' || rowspan=2 | {{calc|get_def|3.5|100}} || rowspan=2 | {{calc|get_def|3.5|100|true}} | |||
|- | |||
| '''Nightmare Keeper''' | |||
|- | |||
| '''Dream Eater (Phase 2)''' || <!--{{calc|get_def|3.5|100}}--> || <!--{{calc|get_def|3.5|100|true}}--> 59.94% | |||
|} | |||
<span style="display:none">}}</span> | <span style="display:none">}}</span> | ||
| | |Phase1Name=Dream Eater | ||
|Phase1=<span style="display:none">{{</span> | |||
| | <center>'''???.'''</center> | ||
|[[File: | |||
|''' | == Phase Gimmick == | ||
{{se|828|Erosion||sd}} - Upon being hit, players will be inflicted with a stack of {{se|828|Erosion|tt=no}}. Every time a [[Consumable|consumable item]] from your consumables quick slot, or from [[Pet Guide|pet auto consume quick slot]] is used, one stack will be removed. | |||
| | *Upon receiving 10 stacks, players will be inflicted with {{se|829|Confusion||sd}}, which will decrease their attack as well as cause any attacks to heal the boss. This debuff lasts for 15 seconds. | ||
| | ---- | ||
| | ==Boss== | ||
| ''' | {| class="wikitable" border="1" cellpadding="5" style="border-spacing: 0; border: 1px #000 solid; border-collapse: collapse; width: 100%; vertical-align: top;" | ||
|+ [[File:Icon - Warning.png|20px]] Attacks highlighted in {{color|red|red}} bypass invincibility frames. | |||
|- | |||
! width=50% | Boss Attacks !! width=50% | Tips | |||
|- | |||
| | |||
*'''Teleport:''' Teleports to a random location on the stage. | |||
| | |||
*It is recommended to gather in the lower left corner, as the Dream Eater will more frequently teleport there. | |||
*The Dream Eater can be attacked while teleporting. | |||
|- | |||
| | |||
*'''Slash:''' Swings his arms once or twice. Each hit will inflict {{se||Leg Injury|tt=no}} and launch players quite far away. | |||
| | |||
*This is the boss' most frequent attack. Because of this, using skills or items that provide {{se||Super Armor|tt=no}} are recommended to avoid being launched away. | |||
|- | |||
| | |||
*{{color|red|Slice|b=1}}: Casts a large shockwave that hits either the top half or the bottom half of the map, dealing heavy damage to any players hit. | |||
| | |||
*When the attack indicator appears, there is about 2 seconds before the attack goes off. | |||
*The bottom half shockwave has a hitbox that is slightly larger than what its visuals may imply. If possible, it is recommended to remain in the air above the upper platform. | |||
|- | |||
| | |||
*{{color|red|Black Storm|b=1}}: Teleports to the middle of the arena, then casts three storms of demonic energy that instantly kill any players hit. Two storms will spawn on the edges of the map, and one large storm will spawn in the middle of the map. | |||
| | |||
*The storms on the edges will always activate first, and the middle storm will activate shortly afterwards. To avoid being hit, players must initially wait inside the middle storm. Once the storms on the edges begin to dissipate (indicated by the storms turning black), players must run to the edge of the map before the middle storm activates. | |||
*After spawning the storms, the Dream Eater will continue to move and attack as usual. Be especially cautious to avoid being hit by '''Slash''' and launched in an undesirable direction. | |||
|- | |||
| | |||
*{{color|red|Link Up|b=1}}: Marks two random players with connected {{color|blue|circle sigils}}, and the remaining two players with connected {{color|purple|square sigils}}. After a certain amount of time, if certain conditions are not fulfilled, the sigils will explode, instantly killing marked players and any players nearby. | |||
| | |||
*The players marked with the {{color|blue|circle sigils}} must stay ''close'' to each other. If they are too far apart, the sigil and tether will turn {{color|red|red}}. | |||
*The players marked with the {{color|purple|square sigils}} must stay ''away'' from each other. If they are too close, the sigil and tether will turn {{color|red|red}}. | |||
*It is recommended for players to gather in the bottom left corner of the stage, if not there already. One player marked with the {{color|purple|square sigil}} (usually the weaker DPS or support character) should move to the far right of the stage while the rest of the party continue attacking Dream Eater. | |||
**Take care to avoid being hit by '''Slash''' and launched in an undesirable direction, as it can result in a total party kill during this mechanic. | |||
|- | |||
| | |||
*{{color|red|Shadow Clones|b=1}}: Teleports to the central platform and spawns four shadow clones randomly on the map. Each shadow clone will tether to a random player, and after roughly 4 seconds, will dash in the direction of the tether, dealing heavy damage on contact. | |||
| | | | ||
* | *Player must position themselves such that the Dream Eater boss is in between them and their tethered shadow clone. This will cause the shadow to dash into Dream Eater. | ||
*If all 4 clones hit Dream Eater, he will enter a groggy state for about 3 seconds, and all {{se|828|Erosion|tt=no}} debuffs will be removed. | |||
*Players should take caution to not stand too close to Dream Eater, as they may get hit by the shadow clone contact explosion. | |||
* | |||
|- | |- | ||
| | | | ||
*'''??? | *{{color|red|Space Division|b=1}}: Prepares himself to launch a series of fatal slashes. These slashes deal heavy damage and players who are hit will have their screens darkened for a few seconds. | ||
| | |||
*The slashes will occur roughly 3 seconds after the initial warning lines appear. | |||
*If Dream Eater's HP is below 150 bars, he will cast this attack twice in a row. | |||
*In most of the slash patterns, the bottom right corner will be safe. | |||
|} | |||
<span style="display:none">}}</span> | |||
|Phase2Name=Dream Eater & Nightmare Keeper | |||
|Phase2=<span style="display:none">{{</span> | |||
<center>'''???.'''</center> | |||
== Phase Gimmick == | |||
---- | |||
==Boss== | |||
{| class="wikitable" border="1" cellpadding="5" style="border-spacing: 0; border: 1px #000 solid; border-collapse: collapse; width: 100%; vertical-align: top;" | |||
|+ [[File:Icon - Warning.png|20px]] Attacks highlighted in {{color|red|red}} bypass invincibility frames. | |||
|- | |||
! width=50% | Boss Attacks !! width=50% | Tips | |||
|- | |- | ||
| | | | ||
* | * | ||
|} | |||
<span style="display:none">}}</span> | <span style="display:none">}}</span> | ||
| BDrop={{tabs|divclass=forceland|name=1|tab1=Swirling Phantasma|contents1={{:19-2Bdrop1}} |tab2=Heart Core Shard|contents2={{:19-2Bdrop2}}}} | | BDrop={{tabs|divclass=forceland|name=1|tab1=Swirling Phantasma|contents1={{:19-2Bdrop1}} |tab2=Heart Core Shard|contents2={{:19-2Bdrop2}}}} | ||
| SBGM=[http://www.youtube.com/watch?v=DgTgEmdKvIU '''''music098_boss'''''] | | SBGM=[http://www.youtube.com/watch?v=DgTgEmdKvIU '''''music098_boss'''''] | ||
| Line 71: | Line 120: | ||
{{tabs | {{tabs | ||
|name=Dialog | |name=Dialog | ||
|tab1=Phase 1 Dialogue | |||
|contents1= | |||
*{{StoryIcon|Vasili2}} '''Vasili:''' ''Incarcer, Torta... What are you.'' | |||
*{{StoryIcon|Chv}} '''Ciel:''' ''Is it already consumed by the demonic energy of abyss...'' | |||
*{{StoryIcon|Vasili2}} '''Vasili:''' ''What's this? Prey is talking? Who are you, telling me wh | |||
*{{StoryIcon|DB}} '''Add:''' ''... He lost all sense of decorum along with his head.'' | |||
|tab2=Phase 2 Dialogue | |||
|contents2= | |||
*{{StoryIcon|AS}} '''Aisha:''' ''Be careful not to be caught in a cage! You'll fall asleep'' | |||
*{{StoryIcon|ES}} '''Elesis:''' ''It's pretty tough. If we drag this on, and more of us'' | |||
*{{StoryIcon|Ish}} '''Lu:''' ''There's no need to be negative. You can wake up from the'' | |||
*{{StoryIcon|RaS}} '''Laby:''' ''Should we throw something? Maybe a clang! shattering sound will wake everyone up!'' | |||
|tab3=Ending Dialogue | |||
|contents3= | |||
*{{StoryIcon|Vasili2}} '''Vasili:''' ''I will open the way to Earl Ran.'' | |||
*{{StoryIcon|Vasili2}} '''Vasili:''' ''I wish you luck.'' | |||
|tab4=Dungeon Victory Quote | |tab4=Dungeon Victory Quote | ||
|contents4= | |contents4= | ||
Latest revision as of 15:32, 22 June 2024
- English

Nightmare's Crib
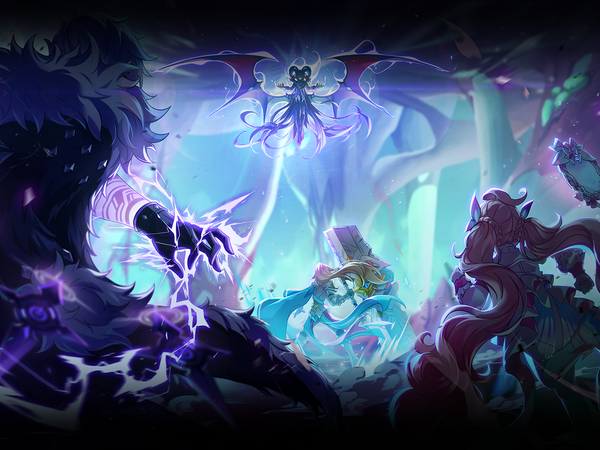
| “ | The nest swallowed by Abyss. It brings comfort despite its deadliness. A primordial land, the unfortunate helper falls into a deep slumber.
|
” |
Description
Move forward following the trace left by the guide, and meet an unfamiliar look of a familiar face.
Recommended Level
99
Required Combat Power
- Story Mode
- Normal Mode
2,500,000
Entry Requirements
Details
- Most enemy attacks in this dungeon ignore players' physical and magical defense (either fully or partially).
Demon Realm
- The El's power does not reach into this realm, Attack and HP will be reduced by 90%. Enemies will have a 20% chance to resist your critical hits.
Boss Defenses
| Boss Name | Defense (Raw) | Defense (Percentage) |
|---|---|---|
| Dream Eater (Phase 1) | 21883 | 83.91% |
| Nightmare Keeper | ||
| Dream Eater (Phase 2) | 59.94% |
- Phase 1
- Phase 2
Phase 1 - Dream Eater
Phase Gimmick
![]() Self DebuffErosionSelf DebuffErosion - Upon being hit, players will be inflicted with a stack of
Self DebuffErosionSelf DebuffErosion - Upon being hit, players will be inflicted with a stack of ![]() ErosionErosion. Every time a consumable item from your consumables quick slot, or from pet auto consume quick slot is used, one stack will be removed.
ErosionErosion. Every time a consumable item from your consumables quick slot, or from pet auto consume quick slot is used, one stack will be removed.
- Upon receiving 10 stacks, players will be inflicted with
 Self DebuffConfusionSelf DebuffConfusion, which will decrease their attack as well as cause any attacks to heal the boss. This debuff lasts for 15 seconds.
Boss
| Boss Attacks | Tips |
|---|---|
|
|
|
|
|
|
|
|
|
|
|
|
|
|
Dialogue
{{
}}
| Image | Name | Boss | Character | Stats | Set Effects |
|---|---|---|---|---|---|
 |
Accessory (Bottom Piece): |
2 Pieces:
3 Pieces:
|
{{
}}
Trivia
Updates
| Date | Changes | |
|---|---|---|
| KR | NA | |
| 08/04/2022 | 8/31/2022 |
|
| 08/11/2022 | 9/28/2022 |
|
- Region 19~20
- Region 1~6
- Region 7~12
- Region 13~18
- Laby
- Noah
- Lithia
- Other
- Miscellaneous


