Tricky House: Difference between revisions
m (Text replacement - "{{se|105|Conviction||ed|icon=no}} (Weapon's Petrifying)" to "{{se|105|Petrifying||ed|icon=no}}") |
No edit summary |
||
| (6 intermediate revisions by 2 users not shown) | |||
| Line 15: | Line 15: | ||
*The El's power does not reach into this realm, Attack and HP will be reduced by 90%. | *The El's power does not reach into this realm, Attack and HP will be reduced by 90%. | ||
===The Route Wheels=== | ====The Route Wheels==== | ||
After defeating Mr. Hat (Mini Boss), the wheels on the background will spin to decide a random route. | After defeating Mr. Hat (Mini Boss), the wheels on the background will spin to decide a random route. | ||
====Block Labyrinth==== | |||
Players must defeat several mobs hiding in the labyrinth. The stage contains moving platforms that can be used to access different areas of the map. | =====Block Labyrinth===== | ||
Players must defeat several mobs hiding in the labyrinth. The stage contains moving platforms that can be used to access different areas of the map. Players can only toggle them on and off via [[Commands]] and [[:Category:Active Skills|Active Skills]]. | |||
'''Note''': | '''Note''': | ||
*It is recommended to send the strongest teammates to the bottom areas, as the most tanky mobs spawn there. | *It is recommended to send the strongest teammates to the bottom areas, as the most tanky mobs spawn there. | ||
====Chess Game==== | |||
=====Chess Game===== | |||
====Cog Tower==== | Players will spawn on a chess board and must defeat the King and the Queen to proceed. However, they are invulnerable until all the Bishops and Rooks are defeated. Each Bishop and Rook is protected by a barrier, respectively colored red or green, and can only be damaged by players who pick up the matching color orb that spawns on the map. Once all the Bishops/Rooks are defeated, the King and Queen will be vulnerable for a period of time before summoning more. | ||
=====Cog Tower===== | |||
Players are teleported to an enormous carousel that will keep spinning. Players must defeat all the mobs and ascend to the highest point of the carousel tower. | |||
'''Note''': | '''Note''': | ||
*The mobs will | *The mobs will often slip off the carousel to a lower level. It is recommended to take homing skills to deal with these mobs. Alternatively, one player can stay on the lower level to clean up after any mobs that fall. | ||
<dfn>}}</dfn> | <dfn>}}</dfn> | ||
| DunMap=[[File:18-2map.png]] | | DunMap=[[File:18-2map.png]] | ||
| Line 38: | Line 41: | ||
| '''Betty''' - A demon bat. | | '''Betty''' - A demon bat. | ||
| | | | ||
*'''{{color|red|Bite}}:''' | *'''{{color|red|Bite}}:''' Bites a target in front of it. | ||
*'''Leech:''' | *'''Leech:''' Bites a target and holds on, continuously draining the player's HP. Players can shake Betty off by mashing the arrow keys. | ||
|- | |- | ||
|[[File:18-2box.png|60px]] | |[[File:18-2box.png|60px]] | ||
| '''Betty-in-a-Box''' - A wind up box that pops out 5 Betties when | | '''Betty-in-a-Box''' - A wind up box that pops out 5 Betties when attacked. | ||
| | | | ||
*'''Note''': The first stage of the dungeon and the last stage of '''Cog Tower''' can be instantly cleared if all the boxes are opened up at the same time. | *'''Note''': The first stage of the dungeon and the last stage of '''Cog Tower''' can be instantly cleared if all the boxes are opened up at the same time. | ||
| Line 49: | Line 52: | ||
| '''Bishop''' - A chess piece in the shape of a bishop. | | '''Bishop''' - A chess piece in the shape of a bishop. | ||
| | | | ||
*'''Bishop's Eye:''' | *'''Bishop's Eye:''' Fires a ball of light from its eye that travels a short distance forwards. | ||
*'''Bishop's Aura''': Continuously | *'''Bishop's Aura''': Continuously hitstuns enemies in a small red area around itself. | ||
*'''Teleport''': Diagonally | *'''Teleport''': Diagonally moves anywhere on the board (Chess Mode only). | ||
*'''Protection''': Cannot be | *'''Protection''': Cannot be attacked unless the player has the red buff (Chess Mode only). | ||
|- | |- | ||
|[[File:18-2mob2.png|60px]] | |[[File:18-2mob2.png|60px]] | ||
| '''Rook''' - A chess piece in the shape of a rook. | | '''Rook''' - A chess piece in the shape of a rook. | ||
| | | | ||
*'''Rook's Move:''' | *'''Rook's Move:''' Charges forward with increased defensive capabilities. | ||
*'''Shield''' - | *'''Shield''' - Enters a defensive mode, greatly reducing damage taken. | ||
*'''Teleport''': Vertically or horizontally | *'''Teleport''': Vertically or horizontally moves anywhere on the board (Chess Mode only). | ||
*'''Protection''': Cannot be | *'''Protection''': Cannot be attacked unless the player has the green buff (Chess Mode only). | ||
<dfn>}}</dfn> | <dfn>}}</dfn> | ||
| MiniBoss=<dfn>{{</dfn> | | MiniBoss=<dfn>{{</dfn> | ||
| Line 69: | Line 72: | ||
| '''Mr. Hat''' - The master of the house of tricks. An invisible man. | | '''Mr. Hat''' - The master of the house of tricks. An invisible man. | ||
| | | | ||
*'''Dice Throw:''' | *'''Dice Throw:''' Throws two dice in front. These dice can bounce off of walls. | ||
*'''Magic Box:''' | *'''Magic Box:''' Claps his hands and spawns a shadowy dark aura under a marked target. After a moment, a magic trick box will appear in that place, trapping the target if still in range. Trapped players can free themselves by rapidly mashing the left and right arrow keys. | ||
*'''Summon''': | *'''Summon''': Summons a Betty. | ||
*'''Wheel of Fortune''': | *'''Wheel of Fortune''': Spins the wheel in the background to decide a random pattern. | ||
**'''{{color|red|Cog Burst}}''': If the wheel | **'''{{color|red|Cog Burst}}''': If the wheel lands on the '''Cog Tower''' symbol, two giant cogs will appear on both sides, continuously moving towards the boss and dealing damage. They will disappear at a certain distance from each other. | ||
**'''Summon Chess Pieces''': If the wheel | **'''Summon Chess Pieces''': If the wheel lands on the '''Chess Game''' symbol, Mr. Hat will summon a Rook and a Bishop. | ||
**'''{{color|red|Suits You}}''': If the wheel | **'''{{color|red|Suits You}}''': If the wheel lands on the '''Block Labyrinth''' symbol, Mr. Hat will summon giant cards across the map and then cause them to explode. | ||
***The boss will indicate the safe spot card shortly before the explosion, displaying a small symbol above his head (clubs ♣, diamonds ♦, hearts ♥, | ***The boss will indicate the safe spot card shortly before the explosion, displaying a small symbol above his head (clubs ♣, diamonds ♦, hearts ♥, or spades ♠). | ||
'''Note:''' | '''Note:''' | ||
*The miniboss has 3 {{se||Freeze}} and | *The miniboss has 3 {{se||Freeze}} and unlimited {{se|105|Petrifying||ed|icon=no}} ticks, so a proper use of those is highly recommended to avoid patterns. | ||
* | *Mr. Hat will continuously walk to a random party member, unless immobilized. | ||
|- | |- | ||
|[[File:18-2miniboss3.png|60px]] | |[[File:18-2miniboss3.png|60px]] | ||
| '''King''' - A chess piece in the shape of a king. | | '''King''' - A chess piece in the shape of a king. | ||
| | | | ||
* | *{{color|red|Field Explosion|b=1}}: Marks 9 squares around it and makes them explode. Each square deals individual damage. The King will teleport to a random spot from the marked squares afterwards. | ||
*'''Protection''': Cannot be hit if there are Rooks | *'''Protection''': Cannot be hit if there are Rooks or Bishops on the board. | ||
|- | |- | ||
|[[File:18-2miniboss2.png|60px]] | |[[File:18-2miniboss2.png|60px]] | ||
| '''Queen''' - A chess piece in the shape of a queen. | | '''Queen''' - A chess piece in the shape of a queen. | ||
| | | | ||
* | *{{color|red|Energy Beam|b=1}}: Marks a vertical, horizontal or diagonal line across the board and shoots an energy beam. The Queen will teleport to the end of its beam afterwards. | ||
*'''Protection''': Cannot be hit if there are Rooks | *'''Protection''': Cannot be hit if there are Rooks or Bishops on the board. | ||
'''Note''': | '''Note''': | ||
*The Queen | *The Queen will keep teleporting across the map, so it is best to immobilize her for as long as possible. | ||
<dfn>}}</dfn> | <dfn>}}</dfn> | ||
| Obstacle=<dfn>{{</dfn> | | Obstacle=<dfn>{{</dfn> | ||
|- | |- | ||
|[[File:18-2platform.png|60px]]<br><br>[[File:18-2platform2.png]] | |[[File:18-2platform.png|60px]]<br><br>[[File:18-2platform2.png]] | ||
|'''Switch Platforms''' - Platforms that will move in and out of the background when their switch is activated with | |'''Switch Platforms''' - Platforms that will move in and out of the background when their switch is activated with command attacks. When toggling, they are capable of knocking away any players who come into contact with them, ignoring invincibility frames. | ||
'''Note''': | '''Note''': | ||
*The platforms can often knock other players down to pitfalls, so it is recommended to not attack the toggle mechanism multiple times. | |||
*The platforms can often knock other players down to pitfalls, so | |||
|- | |- | ||
|[[File:18-2portal.png|60px]] | |[[File:18-2portal.png|60px]] | ||
|'''Portals''' - Portals which teleport | |'''Portals''' - Portals which teleport players to different parts of the map. | ||
|- | |- | ||
|[[File:18-2cog.png|60px]] | |[[File:18-2cog.png|60px]] | ||
|'''Spinning Gears''' - Large gears | |'''Spinning Gears''' - Large gears that continuously spin in circles. Players are able to stand on them. | ||
|- | |- | ||
|[[File:18-2pad.png|60px]] | |[[File:18-2pad.png|60px]] | ||
|'''Launch Pads''' - Platforms which propel | |'''Launch Pads''' - Platforms which propel players upwards. | ||
|- | |- | ||
|[[File:18-2pitfall.png|60px]] | |[[File:18-2pitfall.png|60px]] | ||
|'''Pitfalls''' - Players who fall | |'''Pitfalls''' - Players who fall in one will lose a set amount of HP, then respawn on the left of the map in a knocked down state. | ||
<dfn>}}</dfn> | <dfn>}}</dfn> | ||
| Boss=<dfn>{{</dfn> | | Boss=<dfn>{{</dfn> | ||
| Line 128: | Line 126: | ||
| '''Mr. Hat''' - The master of the house of tricks. An invisible man. | | '''Mr. Hat''' - The master of the house of tricks. An invisible man. | ||
| | | | ||
*'''Dice Throw:''' | *'''Dice Throw:''' Throws two dice in front. These dice can bounce off of walls. | ||
*'''Magic Box:''' | *'''Magic Box:''' Claps his hands and spawns a shadowy dark aura under a marked target. After a moment, a magic trick box will appear in that place, trapping the target if still in range. Trapped players can free themselves by rapidly mashing the left and right arrow keys. | ||
*'''Summon:''' | *'''Summon:''' Summons a Rook and a Bishop. | ||
* | *{{color|red|Suits You|b=1}}: Summons giant cards across the map and then causes them to explode. | ||
**The boss will indicate the safe spot card shortly before the explosion, displaying a small symbol above his head (clubs ♣, diamonds ♦, hearts ♥, | **The boss will indicate the safe spot card shortly before the explosion, displaying a small symbol above his head (clubs ♣, diamonds ♦, hearts ♥, or spades ♠). | ||
*'''{{color|red|Painted Hand}}:''' A hand will emerge from one of the paintings and slam the ground. | *'''{{color|red|Painted Hand}}:''' A hand will emerge from one of the paintings and slam the ground. | ||
*'''{{color|red|Portal Painting}}:''' | *'''{{color|red|Portal Painting}}:''' Disappears, then comes rushing out of one of the paintings, dealing heavy damage to players in his way. | ||
**The attack does not reach the left (or right, depending on which painting the boss comes out of) bottom corner. | **The attack does not reach the far left (or right, depending on which painting the boss comes out of) bottom corner. | ||
*'''Peek-A-Boo:''' | *'''Peek-A-Boo:''' Summons another Mr. Hat. The clone spawns at full HP and can only perform the '''Dice Throw''' pattern. Always disappears when the '''Masquerade''' pattern is over. | ||
*'''{{color|red|Masquerade}}:''' | *'''{{color|red|Masquerade}}:''' Divides the map into two areas (blue and red). Entering the area will provide a status ailment. Players with different types of the debuff will be able to attack each other. | ||
**The | **The debuff's duration is 5 seconds, so it is possible to receive damage from both sides at the same time. | ||
'''Note:''' | '''Note:''' | ||
*The boss has 3 {{se||Freeze}} and | *The boss has 3 {{se||Freeze}} and unlimited {{se|105|Petrifying||ed|icon=no}} ticks, so a proper use of those is highly recommended to avoid patterns. | ||
*The '''Painted Hand''' pattern | *The '''Painted Hand''' pattern deals significant damage and is capable of oneshotting players, so a proper usage of [[Resurrection#Resurrection-type Skills and Titles|Resurrection-type Skills and Titles]] is recommended. | ||
* | *Mr. Hat will continuously walk to a random party member, unless immobilized. | ||
<dfn>}}</dfn> | <dfn>}}</dfn> | ||
| BDrop={{:18-2Bdrop1}} | | BDrop={{:18-2Bdrop1}} | ||
| Line 157: | Line 155: | ||
</gallery> | </gallery> | ||
| Dialogue= | | Dialogue= | ||
{{ | {{tabber | ||
| | |$divclass=tabber-vertical | ||
| | |Dungeon Start Dialogue={{*}}{{StoryIcon|Eris}} '''Eris''': ''Have fun at the Tricky House!'' | ||
|Mid Boss Outro Dialogue= | |||
| | *{{StoryIcon|MrHat}} '''Mr. Hat:''' ''~ ♩ ♫'' | ||
|Mid Dungeon Dialogue= | |||
*{{StoryIcon|MrHat}} ''' | ''Upon entering the '''Block Labyrinth''':'' | ||
| | {{*}}{{StoryIcon|CC}} '''Chung:''' ''This is a complicated space. Let's be careful not to be lost'' | ||
{{*}}{{StoryIcon|Lib}} '''Noah:''' ''(Hm, I think we're already lost though...?)'' | {{*}}{{StoryIcon|Lib}} '''Noah:''' ''(Hm, I think we're already lost though...?)'' | ||
| | ---- | ||
''Upon clearing '''Chess Game''':'' | |||
{{*}}{{StoryIcon|Chv}} '''Ciel:''' ''Checkmate, right?'' | |||
---- | |||
''Upon clearing '''Cog Tower''':'' | |||
{{*}}{{StoryIcon|Rabbit}} '''Rabbit:''' ''.......'' | |||
{{*}}{{StoryIcon|Blu}} '''Ain:''' ''Now, Mr. Rabbit? Please guide us to the magician. | |||
|Dungeon Victory Quote= | |||
*'''Elsword:''' ''Stop with your tricks, magician! You won't get away with tricks like... Wait, where is everyone? Hello! Where did everyone go?'' | *'''Elsword:''' ''Stop with your tricks, magician! You won't get away with tricks like... Wait, where is everyone? Hello! Where did everyone go?'' | ||
*'''Aisha:''' ''Whew... Whew! It's kind of... After I came in here, something talked to me! The road goes round and round. Weird whispers can't be whispered... I'm upset! It's best not to listen to it!'' | *'''Aisha:''' ''Whew... Whew! It's kind of... After I came in here, something talked to me! The road goes round and round. Weird whispers can't be whispered... I'm upset! It's best not to listen to it!'' | ||
*'''Rena:''' ''The playful magician wants to play with us, but it's a foul play to be a coworker! Now, where are the Sirijin people?'' | *'''Rena:''' ''The playful magician wants to play with us, but it's a foul play to be a coworker! Now, where are the Sirijin people?'' | ||
*'''Raven:''' ''The sounds must be part of an illusion created by this space and magician's tricks... but I was able to hear voices of someone I missed. I suppose I should thank you for that. Now, you will pay for playing with me.'' | *'''Raven:''' ''The sounds must be part of an illusion created by this space and magician's tricks... but I was able to hear voices of someone I missed. I suppose I should thank you for that. Now, you will pay for playing with me.'' | ||
*'''Eve:''' '' | *'''Eve:''' ''Speaking of... It's fascinating that the illusions still work on an inorganic being like me. It seems to be showing something each of us want or afraid of. What did you see, Moby, Remy?'' | ||
*'''Chung:''' ''I followed the voices because I thought they were the voices of the rest of the party, and I was completely fooled. This space is truly a tricky place... I'm easily fooled so this is trouble...'' | *'''Chung:''' ''I followed the voices because I thought they were the voices of the rest of the party, and I was completely fooled. This space is truly a tricky place... I'm easily fooled so this is trouble...'' | ||
*'''Ara:''' ''It's an unusual space. The road seems to keep changing. Still, if you go according to the rabbit's will, you'll find the right way. What? Can't you hear Eun?'' | *'''Ara:''' ''It's an unusual space. The road seems to keep changing. Still, if you go according to the rabbit's will, you'll find the right way. What? Can't you hear Eun?'' | ||
*'''Elesis:''' '' | *'''Elesis:''' ''Hah! I must admit, this magician is up to some interesting tricks. I wasn't sure how to deal with him, but once the tricks are reveals, he's nothing! Haha! I will give you A for effort.'' | ||
*'''Add:''' ''This place is getting on my nerves starting from the tacky interior.'' | *'''Add:''' ''This place is getting on my nerves starting from the tacky interior.'' | ||
*'''Lu:''' ''A magician? Aren't you just full of trouble. However, the doll that looked like it was sewn haphazardly was a bit too much. Don't you agree, Ciel?'' | *'''Lu:''' ''A magician? Aren't you just full of trouble. However, the doll that looked like it was sewn haphazardly was a bit too much. Don't you agree, Ciel?'' | ||
*'''Ciel:''' ''( | *'''Ciel:''' ''(The rabbit doll... was cute. I wonder if I can take one home.)'' | ||
*'''Rose:''' '' | *'''Rose:''' ''Hm... The interior of this place is great! It's impressive and unique. I like it! I would like one of that picture frame in the magician's room myself! | ||
*'''Ain:''' '' | *'''Ain:''' ''The inside is just as messy as the outside. I wished to see the face of the one living in a place like this... Mm... Mm? Did I wish for too much?'' | ||
*'''Laby:''' ''Whoo! This place is so funny! But it's a little unruly, and it's good to be a naughty, but if you act yourself, everyone will be in trouble. I’ll teach you how to have fun!'' | *'''Laby:''' ''Whoo! This place is so funny! But it's a little unruly, and it's good to be a naughty, but if you act yourself, everyone will be in trouble. I’ll teach you how to have fun!'' | ||
*'''Noah:''' ''Wow... Magicians are so interesting. | *'''Noah:''' ''Wow... Magicians are so interesting. That magician doesn't have a head. I wonder what kind of trick that is. Do you want to see, Clamor? ......Ack, alright! I'll lower my arm so stop screaming!'' | ||
}} | }} | ||
|Trivia=<dfn>{{</dfn> | |Trivia=<dfn>{{</dfn> | ||
Latest revision as of 02:46, 26 February 2024
- English
Tricky House
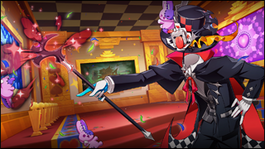
| “ | A magical space full of mischief prepared by the greatest magician. It sounds like someone is whispering to us.
|
” |
Demon Realm
- The El's power does not reach into this realm, Attack and HP will be reduced by 90%.
The Route Wheels
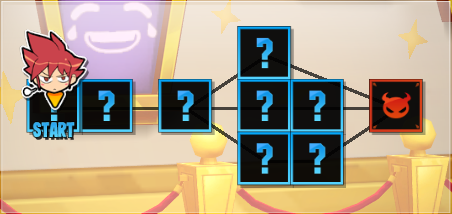
After defeating Mr. Hat (Mini Boss), the wheels on the background will spin to decide a random route.
Block Labyrinth
Players must defeat several mobs hiding in the labyrinth. The stage contains moving platforms that can be used to access different areas of the map. Players can only toggle them on and off via Commands and Active Skills.
Note:
- It is recommended to send the strongest teammates to the bottom areas, as the most tanky mobs spawn there.
Chess Game
Players will spawn on a chess board and must defeat the King and the Queen to proceed. However, they are invulnerable until all the Bishops and Rooks are defeated. Each Bishop and Rook is protected by a barrier, respectively colored red or green, and can only be damaged by players who pick up the matching color orb that spawns on the map. Once all the Bishops/Rooks are defeated, the King and Queen will be vulnerable for a period of time before summoning more.
Cog Tower
Players are teleported to an enormous carousel that will keep spinning. Players must defeat all the mobs and ascend to the highest point of the carousel tower.
Note:
- The mobs will often slip off the carousel to a lower level. It is recommended to take homing skills to deal with these mobs. Alternatively, one player can stay on the lower level to clean up after any mobs that fall.
| Monster Image | Boss Description | Boss Moves |
|---|---|---|

|
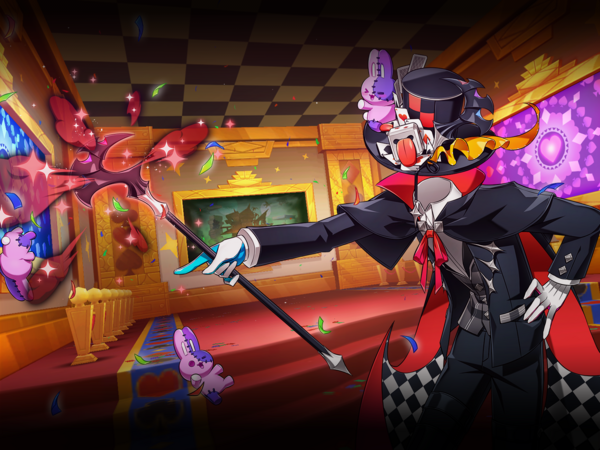
Mr. Hat - The master of the house of tricks. An invisible man. |
Note:
|

|
King - A chess piece in the shape of a king. |
|

|
Queen - A chess piece in the shape of a queen. |
Note:
}} |
| Monster Image | Boss Description | Boss Moves |
|---|---|---|

|
Mr. Hat - The master of the house of tricks. An invisible man. |
Note:
}} |
| Image | Name | Boss | Character | Stats |
|---|---|---|---|---|
 |
Face Accessory (Top): |
| Date | Changes | |
|---|---|---|
| KR | NA | |
| 12/23/2021 | 01/12/2022 |
|
| 02/17/2022 | 03/16/2022 |
|
| 03/17/2022 | 04/14/2022 |
|
- Region 13~18
- Region 1~6
- Region 7~12
- Region 19~20
- Laby
- Noah
- Lithia
- Other
- Miscellaneous
| Rigomor | Master Road | Pruinaum Outskirts | |||
|---|---|---|---|---|---|
| {{ }} | {{ }} | {{ }} | {{ }} | {{ }} | {{ }} |
- Region 13~18
- Region 1~6
- Region 7~12
- Region 19~20
- Other
