Old Maps: Difference between revisions
From Elwiki
Gameboy224 (talk | contribs) No edit summary |
IceSoulMOG (talk | contribs) No edit summary |
||
| (7 intermediate revisions by 2 users not shown) | |||
| Line 39: | Line 39: | ||
{{!}}- | {{!}}- | ||
{{!}}[[File:Ruben_Outskirt_Map.png|202px]] | {{!}}[[File:Ruben_Outskirt_Map.png|202px]] | ||
{{!}}'''Suburbs of Ruben''' | {{!}}'''[[Suburbs of Ruben]]''' | ||
{{!}}[[File:Tutorialselect.png]] | {{!}}[[File:Tutorialselect.png]] | ||
{{!}}'''[[Old Tutorial|Tutorial]]''' | {{!}}'''[[Old Tutorial|Tutorial]]''' | ||
| Line 69: | Line 69: | ||
{{!}}[[Ymir's Time and Space/Elder|'''Ymir's Time and Space: Elder''']] | {{!}}[[Ymir's Time and Space/Elder|'''Ymir's Time and Space: Elder''']] | ||
{{!}}[[File:Elder_Outskirts_Minimap.png|202px]] | {{!}}[[File:Elder_Outskirts_Minimap.png|202px]] | ||
{{!}}'''Suburbs of Elder''' | {{!}}'''[[Suburbs of Elder]]''' | ||
{{!}}- | {{!}}- | ||
{{!}}[[File:2-1_(Renewal).png]] | {{!}}[[File:2-1_(Renewal).png]] | ||
| Line 107: | Line 107: | ||
{{!}}[[Dragon Nest: Abyss (Old)|'''Dragon Nest: Abyss''']] | {{!}}[[Dragon Nest: Abyss (Old)|'''Dragon Nest: Abyss''']] | ||
{{!}}[[File:Besma_Outskirts_Minimap.png|202px]] | {{!}}[[File:Besma_Outskirts_Minimap.png|202px]] | ||
{{!}}'''Bethma Mountains''' | {{!}}'''[[Bethma Mountains]]''' | ||
{{!}}- | {{!}}- | ||
{{!}}[[File:Bethagara Falls.png|202px]] | {{!}}[[File:Bethagara Falls.png|202px]] | ||
| Line 135: | Line 135: | ||
{{!}}- | {{!}}- | ||
{{!}}[[File:Minimap_Altera_Outskirts.png|202px]] | {{!}}[[File:Minimap_Altera_Outskirts.png|202px]] | ||
{{!}}'''Altera Island''' | {{!}}'''[[Altera Island]]''' | ||
{{!}}[[File:4-1Icon KR.png]] | {{!}}[[File:4-1Icon KR.png]] | ||
{{!}}[[The Black Crow (Old)|'''The Black Crow''']] | {{!}}[[The Black Crow (Old)|'''The Black Crow''']] | ||
| Line 172: | Line 172: | ||
! width="30%" {{!}} Map Name | ! width="30%" {{!}} Map Name | ||
{{!}}- | {{!}}- | ||
{{!}}[[File:Pilgrim's Gateway.png|202px]] | {{!}}[[File:Pilgrim's Gateway.png|202px]] | ||
{{!}}'''[[Pilgrim's Gateway]]''' | {{!}}'''[[Pilgrim's Gateway]]''' | ||
{{!}}[[File:3x-2select.png|202px]] | {{!}}[[File:3x-2select.png|202px]] | ||
{{!}}'''[[Spiral Corridor]]''' | {{!}}'''[[Spiral Corridor]]''' | ||
{{!}}- | |||
{{!}}[[File:3x-4select.png|202px]] | {{!}}[[File:3x-4select.png|202px]] | ||
{{!}}'''[[Underground Garden]]''' | {{!}}'''[[Underground Garden]]''' | ||
{{!}}[[File:3x-5select.png|202px]] | {{!}}[[File:3x-5select.png|202px]] | ||
{{!}}'''[[Heart of Spire]]''' | {{!}}'''[[Heart of Spire]]''' | ||
| Line 196: | Line 193: | ||
{{!}}- | {{!}}- | ||
{{!}}[[File:Belder_Gate.png|202px]] | {{!}}[[File:Belder_Gate.png|202px]] | ||
{{!}}'''Velder Capital''' | {{!}}'''[[Velder Capital]]''' | ||
{{!}}[[File:Beldermarinaselect.png]] | {{!}}[[File:Beldermarinaselect.png]] | ||
{{!}}'''[[Velder's Pier]]''' | {{!}}'''[[Velder's Pier]]''' | ||
{{!}}- | {{!}}- | ||
{{!}}[[File:5- | {{!}}[[File:5-5Icon KR.png|202px]] | ||
{{!}}'''[[ | {{!}}'''[[Commercial Area 1 (Old)|Commercial Area 1]]''' | ||
{{!}}} | {{!}}} | ||
|tab7=Hamel | |tab7=Hamel | ||
| Line 216: | Line 211: | ||
{{!}}- | {{!}}- | ||
{{!}}[[File:HamelOutskirts.jpg|202px]] | {{!}}[[File:HamelOutskirts.jpg|202px]] | ||
{{!}}'''Hamel Outskirts''' | {{!}}'''[[Hamel Outskirts]]''' | ||
{{!}}[[File:HamelmarinaselectKR.png]] | {{!}}[[File:HamelmarinaselectKR.png]] | ||
{{!}}'''[[Hamel's Pier]]''' | {{!}}'''[[Hamel's Pier]]''' | ||
{{!}}} | {{!}}} | ||
| | |tab99=Miscellaneous | ||
|contents99= | |||
| | |||
===Miscellaneous=== | ===Miscellaneous=== | ||
{{{!}} width="100%" cellspacing="0" cellpadding="5" border="1" style="border-collapse: collapse; text-align: center" | {{{!}} width="100%" cellspacing="0" cellpadding="5" border="1" style="border-collapse: collapse; text-align: center" | ||
| Line 265: | Line 227: | ||
{{!}}[[File:Williamdimselect.png]] | {{!}}[[File:Williamdimselect.png]] | ||
{{!}}'''[[William's Time and Space]]''' | {{!}}'''[[William's Time and Space]]''' | ||
{{!}}[[File:HenirDimensionselect.png]] | {{!}}[[File:HenirDimensionselect.png]] | ||
{{!}}'''[[Henir's Time and Space/Season 1|Henir's Time and Space (Version 1)]]''' | {{!}}'''[[Henir's Time and Space/Season 1|Henir's Time and Space (Version 1)]]''' | ||
{{!}}- | {{!}}- | ||
{{!}}[[File:HenirDimensionselect.png]] | {{!}}[[File:HenirDimensionselect.png]] | ||
{{!}}'''[[Henir's Time and Space/Season 2|Henir's Time and Space (Version 2)]]''' | {{!}}'''[[Henir's Time and Space/Season 2|Henir's Time and Space (Version 2)]]''' | ||
{{!}}[[File:HenirDimensionselect.png]] | {{!}}[[File:HenirDimensionselect.png]] | ||
{{!}}'''[[Henir's Time and Space/Season 3|Henir's Time and Space (Version 3)]]''' | {{!}}'''[[Henir's Time and Space/Season 3|Henir's Time and Space (Version 3)]]''' | ||
{{!}}[[File: | {{!}}- | ||
{{!}}[[ | {{!}}[[File:Ereda.png|202px]] | ||
{{!}}'''[[Ereda Island/Season 1|Ereda Island (Season 1)]]''' | |||
{{!}}[[File:Ereda.png|202px]] | |||
{{!}}'''[[Ereda Island/Season 2|Ereda Island (Season 2)]]''' | |||
{{!}}- | {{!}}- | ||
{{!}}[[File:KR_ICON_Gates_Of_Darkness.png]] | {{!}}[[File:KR_ICON_Gates_Of_Darkness.png]] | ||
{{!}}'''[[Gate of Darkness/Season 1|Gate of Darkness (Season 1)]]''' | {{!}}'''[[Gate of Darkness/Season 1|Gate of Darkness (Season 1)]]''' | ||
{{!}}[[File:KR_ICON_Gates_Of_Darkness.png]] | {{!}}[[File:KR_ICON_Gates_Of_Darkness.png]] | ||
{{!}}'''[[Gate of Darkness/Season 2|Gate of Darkness (Season 2)]]''' | {{!}}'''[[Gate of Darkness/Season 2|Gate of Darkness (Season 2)]]''' | ||
{{!}}- | {{!}}- | ||
{{!}}[[File:Gods3 select.png]] | {{!}}[[File:Gods3 select.png]] | ||
{{!}}'''[[Gate of Darkness/Season 3|Gate of Darkness (Season 3)]]''' | {{!}}'''[[Gate of Darkness/Season 3|Gate of Darkness (Season 3)]]''' | ||
{{!}}[[File:DunnoDungeon.png]] | |||
{{!}}'''Market Trade Plaza''' | |||
{{!}}- | |||
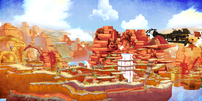
{{!}}[[File:City in the Sky.png|202px]] | |||
{{!}}[[City in the Sky|'''City in the Sky''']] | |||
{{!}}[[File:Fahrmann's Peak.png|202px]] | |||
{{!}}[[Fahrmann's Peak|'''Fahrmann's Peak''']] | |||
{{!}}- | |||
{{!}}[[File:Perkisas.png|center]] | |||
{{!}}[[Perkisas's Ruins|'''Perkisas's Ruins''']] | |||
{{!}}[[File:Eltrion.png|center]][[File:EltrionMK2.png|center]] | |||
{{!}}[[Eltrion MK2|'''Eltrion MK2''']] | |||
{{!}}} | {{!}}} | ||
}} | }} | ||
<br> | <br> | ||
{{Dungeons|name=a|Orient= | {{Dungeons|name=a|Orient=Misc}}{{Hunting Fields|name=b|Orient=Misc}} | ||
Latest revision as of 06:31, 17 April 2023
Old maps... from the ones you miss to the ones you've never heard of.
- Miscellaneous
- Region 1~6
- Region 7~12
- Region 13~18
- Region 19~20
- Laby
- Noah
- Lithia
- Other
- Other
- Region 1~6
- Region 7~12
- Region 13~18
- Region 19~20

