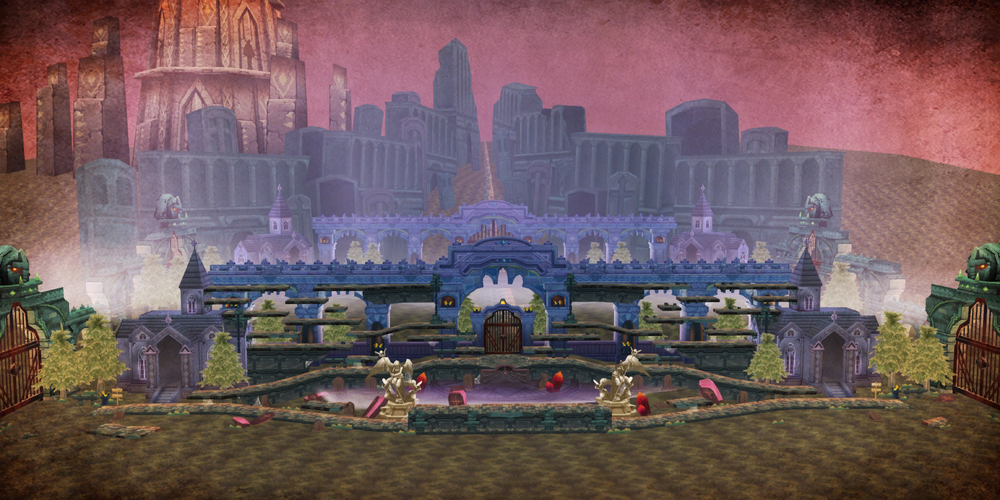
Dead Man's Hill: Difference between revisions

From Elwiki
No edit summary
No edit summary
Line 1: Line 1:
{{Languages|Dead Man's Hill}}
 
{{FieldPageNA
<center>
| Color={{ColorSelNA|Village|5}}
{| cellspacing="0" cellpadding="5" border="1" width="0" style="border-collapse: collapse;"
| Nav=<span style="display: none">{{</span>
|-
|[[Pilgrim's Site]]&larr;
|[[Pilgrim's Site]]&larr;
|[[Dead Man's Hill]]
|[[Dead Man's Hill]]
|&rarr;[[Velder|Velder Village]]
|&rarr;[[Velder|Velder Village]]
<span style="display: none">}}</span>
| Name=Dead Man's Hill
| Map=Dead Man's Hill.png
| LvRange=40-41
| MobC1=Aggressive Mobs:
| MobC2=Reactive Mobs:
| Mob1=<span style="display:none">{{</span>
|[[File:Lesser Glitter Dasher.jpg|60px]]
|'''Lesser Glitter Dasher'''
|-
|-
|}
|[[File:Lesser_Glitter_Guard.jpg|60px]]
</center>
|'''Lesser Glitter Guard'''
{| width="100%" style="font-size:1em; line-height:1.5em;"
| valign="top" style="border:2px solid #782f0f; border-radius: 1px;"|
{| cellspacing="2" cellpadding="5" rules="all" style="margin:0.5em 0.5em 0.5em 0.5em; empty-cells:show;"
|-
|-
|style="font-size: 1em; font-weight: bold; text-align: center; text-shadow: 1px 1px 1px black; border-bottom: 1px #000; border-style: solid; background-color: #782f0f; background-image: linear-gradient(to bottom, lightgray 0%, #782f0f 100%);" colspan="4" | <font color="white">'''Dead Man's Hill'''</font>
|[[File:Lesser_Glitter_Illusionist.jpg|60px]]
|'''Lesser Glitter Illusionist'''
|-
|-
|width="100%" colspan="4" align="center" style="border:1px solid; border-color:#000000; font-size:1em; line-height:1.5em;" valign="top"|[[File:Dead Man's Hill.png|1000px]]
|[[File:Lesser_Glitter_Protector.jpg|60px]]
|'''Lesser Glitter Protector'''
|-
|-
|style="font-size: 1em; font-weight: bold; text-align: center; text-shadow: 1px 1px 1px black; border-bottom: 1px #000; border-style: solid; background-color: #782f0f; background-image: linear-gradient(to bottom, lightgray 0%, #782f0f 100%);" colspan="4" | <font color="white">'''Level Range:'''</font>
|[[File:Lesser_Glitter_Sniper.jpg|60px]]
|'''Lesser Glitter Sniper'''
|-
|-
|width="100%" colspan="4" align="center" style="border:1px solid; border-color:#000000; font-size:1em; line-height:1.5em;" valign="top"|
|[[File:Glitter Zombie.jpg|60px]]
40-41
|'''Glitter Zombie'''
<span style="display:none">}}</span>
| Mob2=<span style="display:none">{{</span>
|[[File:Glitter Zombie.jpg|60px]]
|'''Glitter Zombie'''
<span style="display:none">}}</span>
| MiniBoss=<span style="display:none">{{</span>
==Corrupt Glitter==
{| cellspacing="0" cellpadding="5" border="1" width="100%" style="border-collapse: collapse;"
|-
|-
|style="font-size: 1em; font-weight: bold; text-align: center; text-shadow: 1px 1px 1px black; border-bottom: 1px #000; border-style: solid; background-color: #782f0f; background-image: linear-gradient(to bottom, lightgray 0%, #782f0f 100%);" colspan="2" | <font color="white">'''Aggressive Mobs:'''</font>
! width=60 | Boss Image
|style="font-size: 1em; font-weight: bold; text-align: center; text-shadow: 1px 1px 1px black; border-bottom: 1px #000; border-style: solid; background-color: #782f0f; background-image: linear-gradient(to bottom, lightgray 0%, #782f0f 100%);" colspan="2" | <font color="white">'''Reactive Mobs:'''</font>
! Boss Description
|-
|-
| colspan="2" width="50%" style="border:1px solid; border-color:#000000;" width="50%" valign="top" |
|[[File:Bater.jpg|60px]]
*[[File:Lesser Glitter Dasher.jpg]]
|'''Bater''' - '''Bater''' is one tough Glitter gone wrong. He hardly knows any better than to walk aimlessly and chomp at enemies.
'''Lesser Glitter Dasher'''
|}
*[[File:Lesser_Glitter_Guard.jpg]]
'''Lesser Glitter Guard'''
*[[File:Lesser_Glitter_Illusionist.jpg]]
'''Lesser Glitter Illusionist'''
*[[File:Lesser_Glitter_Protector.jpg]]
'''Lesser Glitter Protector'''
*[[File:Lesser_Glitter_Sniper.jpg]]
'''Lesser Glitter Sniper'''
*[[File:Glitter Zombie.jpg]]
'''Glitter Zombie'''
| colspan="2" width="50%" style="border:1px solid; border-color:#000000;" width="50%" valign="top" |
*[[File:Glitter Zombie.jpg]]
'''Glitter Zombie'''
|-
|style="font-size: 1em; font-weight: bold; text-align: center; text-shadow: 1px 1px 1px black; border-bottom: 1px #000; border-style: solid; background-color: #782f0f; background-image: linear-gradient(to bottom, lightgray 0%, #782f0f 100%);" colspan="4" | <font color="white">'''Field Boss:'''</font>
|-
|width="100%" colspan="4" style="border:1px solid; border-color:#000000; font-size:1em; line-height:1.5em;" valign="top"|
==Corrupt Glitter==
*[[File:Bater.jpg]]
'''Bater''' - '''Bater''' is one tough Glitter gone wrong. He hardly knows any better than to walk aimlessly and chomp at enemies.
==Gigantic Jubigee==
*[[File:Wamu.jpg|60px]]
{| cellspacing="0" cellpadding="5" border="1" width="100%" style="border-collapse: collapse;"
'''Wamu''' - This giant can be tough to beat. Avoid the exploding seed pocket at all costs.
|-
|style="font-size: 1em; font-weight: bold; text-align: center; text-shadow: 1px 1px 1px black; border-bottom: 1px #000; border-style: solid; background-color: #782f0f; background-image: linear-gradient(to bottom, lightgray 0%, #782f0f 100%);" colspan="4" | <font color="white">'''BGM:'''</font>
|-
|-
|width="100%" colspan="4" align="center" style="border:1px solid; border-color:#000000; font-size:1em; line-height:1.5em;" valign="top"|  
! width=60 | Boss Image
Dead Man's Hill - [http://www.youtube.com/watch?v=WQ56sLzltps '''''field_peita003''''']
! Boss Description
|-
|-
|width="60%" colspan="6" style="border:0px solid; border-color:#000000; font-size:1em; line-height:0em;" align="center" valign="top"|
|[[File:Wamu.jpg|60px]]
|width="60%" colspan="6" style="border:0px solid; border-color:#000000; font-size:1em; line-height:0em;" align="center" valign="top"|
|'''Wamu''' - This giant can be tough to beat. Avoid the exploding seed pocket at all costs.
|}
|}
|}
<br>
<span style="display:none">}}</span>
{{Hunting Fields}}
| BGM=Dead Man's Hill - [http://www.youtube.com/watch?v=WQ56sLzltps '''''field_peita003''''']
{{Dungeons}}
}}

Revision as of 08:21, 5 October 2014

{{ {{
Pilgrim's Site Dead Man's Hill Velder Village

}}

}}
Dead Man's Hill
Mini Boss
{{ {{

Corrupt Glitter

Epithet Monster Image Boss Description Boss Moves
Boss Image Boss Description
Bater - Bater is one tough Glitter gone wrong. He hardly knows any better than to walk aimlessly and chomp at enemies.

Gigantic Jubigee

Boss Image Boss Description
Wamu - This giant can be tough to beat. Avoid the exploding seed pocket at all costs.

}}

}}
Dead Man's Hill - field_peita003
  • Region 1~6
  • Region 7~12
  • Region 13~18
  • Region 19~20
  • Laby
  • Noah
  • Lithia
  • Other
  • Miscellaneous