Underground Chapel: Difference between revisions
CheeseLuvas (talk | contribs) |
CheeseLuvas (talk | contribs) |
||
| Line 10: | Line 10: | ||
! Monster Description | ! Monster Description | ||
|- | |- | ||
| [[File: | | [[File:ptttttt3x-2.png]] | ||
| '''Gullito Spearman''' <br> A demonic soldier that attacks you using it's spear! | | '''Gullito Spearman''' <br> A demonic soldier that attacks you using it's spear! | ||
|- | |- | ||
| [[File:Ptt3x-2.png]] | | [[File:Ptt3x-2.png]] | ||
| '''Gullito Pounder''' <br> A mace-wielding demonic soldier! | | '''Gullito Pounder''' <br> A clumsy mace-wielding demonic soldier! | ||
|- | |- | ||
| [[File: | | [[File:pttttttt3x-2.png]] | ||
| '''Gullito Defender''' <br> A demonic soldier that uses his shield to protect others and himself from any attack! | | '''Gullito Defender''' <br> A demonic soldier that uses his shield to protect others and himself from any attack! | ||
|- | |- | ||
| Line 25: | Line 25: | ||
| '''Mana Eater''' <br> As it's name suggests, this small creature will take your MP away once your near it by using '''[[Mana Intake]]'''. It'll then run away, but make sure to catch it before it runs away out of the stage, because if you do, you can gain all of your MP back, 100% of it to be exact! | | '''Mana Eater''' <br> As it's name suggests, this small creature will take your MP away once your near it by using '''[[Mana Intake]]'''. It'll then run away, but make sure to catch it before it runs away out of the stage, because if you do, you can gain all of your MP back, 100% of it to be exact! | ||
|- | |- | ||
| [[File: | | [[File:pttttt3x-2.png]] | ||
| '''Gullito Necromancer''' <br> A Gullito that uses it's dark powers of magic to attack you! | | '''Gullito Necromancer''' <br> A Gullito that uses it's dark powers of magic to attack you! | ||
|- | |- | ||
Revision as of 21:42, 14 June 2011
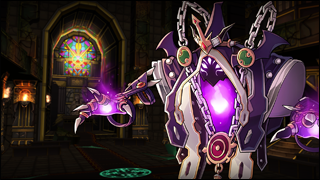
Underground Chapel
As the Elsword Team continued underground, they discovered an underground shrine....

Enemies
| Monster Image | Monster Description | |
|---|---|---|
|
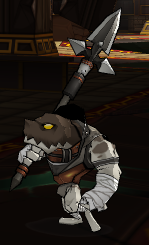
Gullito Spearman A demonic soldier that attacks you using it's spear! | |
|
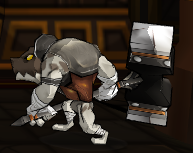
Gullito Pounder A clumsy mace-wielding demonic soldier! | |
|
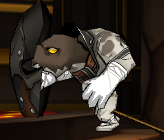
Gullito Defender A demonic soldier that uses his shield to protect others and himself from any attack! | |

|
Gullito Archer A demonic soldier that uses it's crossbow to attack you from any range! | |

|
Mana Eater As it's name suggests, this small creature will take your MP away once your near it by using Mana Intake. It'll then run away, but make sure to catch it before it runs away out of the stage, because if you do, you can gain all of your MP back, 100% of it to be exact! | |

|
Gullito Necromancer A Gullito that uses it's dark powers of magic to attack you! | |
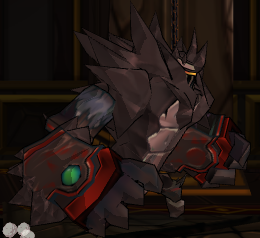
|
Rage Stone Golem An upgraded golem that is much more aggressive than the Stone Golem! | |
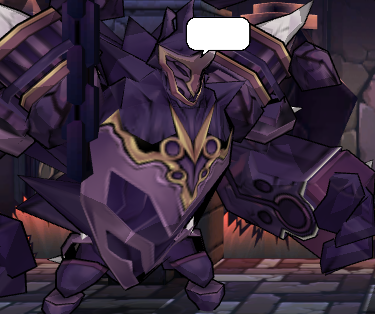
|
Boss, Teach the Tyrant A tremendous golem that guards the Spiral Corridor! |
Moves:
Body Slam: Teach will run and then jump, using it's body to flatten you! Clap: When near you, the boss will clap using his hands, dealing heavy damage. Spin: When crowded, Teach will spin himself around, dealing damage to all those near him. Throw: If you run away, Teach throws one of his floating boulders right at you! |
Obstacles
Pit of doom: There is one pit of doom in this map. Dropping into it will cause a small chunk of your HP to drop.
Mini Boss, Deuter
Deuter looks like a higher ranked version of the Glitter Necromancer and wears red robes along with a small cap. Its moves and attacks are very similar to the boss of this stage. Appears at the alternate path in Very Hard Mode.
Moves
Dark Energy Boomerang: Deuter unleashes a purple stream of dark energy that shoots far away then comes back. Does moderate damage.
Dark Fury: Deuter flexes all of his muscles, then unleashes a few dark spirits around itself. He does this if you get too close to it. The dark spirits can cause the Curse ailment.
Boss, Amethyst
Unlike the traditional necromancers, this necromancer cannot invoke the dead. It floats and cannot be knocked down.
Moves
Teleport: Amethyst can teleport to anywhere in the stage.
Dark Energy Boomerang: Amethyst unleashes a purple stream of dark energy from its fingers that shoots far away then comes back. Does moderate damage.
Dark Fury: Amethyst flexes all his muscles, then unleashes a few dark spirits around itself. He does this if you get too close to it. The dark spirits can cause the Curse ailment.
Dark Spirit Rain: Amethyst holds some dark energy in its fingers, then causes dark spirits to rain from the sky. The dark spirits can cause the Curse ailment.
Dark Spirit Rise: Amethyst raises one of its hands, and invokes dark spirits to rise from the ground in front of him. The dark spirits can cause the Curse ailment.
Special Move, Dark Geysers: At full mana, Amethyst teleports to the center stage and the stage darkens. It raises both its hands and invokes numerous dark streams of energy from the ground which goes to the ceiling and comes back down. This move can be evaded easily if you calm down and understand how the geysers move. The geysers can cause the Curse ailment.
Tactic
Watch for its hands. When it's going to cast a skill, its hand(s) will glow.
This could also use to indicate the side it will cast during the party play if players surrounded boss.
Advanced Elsword (Solo) Tactic: Bring your parry (counter ability, learned at the start like Mega Slash). If you stand up close to him before he does a normal attack, you can counter him and avoid that attack, whether or not its followed by magic. The only attacks that cannot be countered are Dark Fury and Dark Geysers, because they have no Physical hits to them, so they are not counter-able.
Its not hard to do, but you'll have to be quick, and bring some MP pots in case your not replenishing the MP used by counter, because he does use Dark Fury alot. Petrifying Potions are helpful as they restore 50 MP as well as cure the Curse ailment (obtained from a quest by NPC Allegro).
Videos
