Magmanta's Cave: Difference between revisions
Gameboy224 (talk | contribs) |
|||
| Line 50: | Line 50: | ||
*'''[[Rising Slash]]''': They can use Rising Slash exactly the same way that Elsword can. | *'''[[Rising Slash]]''': They can use Rising Slash exactly the same way that Elsword can. | ||
*'''[[Flame Geyser]]''': They can use Flame Geyser exactly the same way that Elsword can. | *'''[[Flame Geyser]]''': They can use Flame Geyser exactly the same way that Elsword can. | ||
*''' | *'''Rising Wave''': They can perform an enhanced version of Rising Slash where instead of summoning 2 swords on both sides, they can summon 6 swords at the direction that they are facing. | ||
*'''[[Stoic]]''': Similar to most bosses, the Red Knights are capable of activating [[Stoic]] whenever they are attacked by a certain number of hits. | *'''[[Stoic]]''': Similar to most bosses, the Red Knights are capable of activating [[Stoic]] whenever they are attacked by a certain number of hits. | ||
==Miniboss: Giant Hammer Bobosse== | ==Miniboss: Giant Hammer Bobosse== | ||
You will fight Bobosse on Hard or Very Hard mode. | You will fight Bobosse on Hard or Very Hard mode. | ||
Revision as of 22:46, 28 June 2013
Magmanta's Cave
Map Layout
| Difficulty | Map |
|---|---|
| Normal | 
|
| Hard / Very Hard | 
|
Mobs
Shadow Port Walker: This is an stronger variant of the Shadow Walker that you have encountered in previous Hamel dungeons. They will use the same attacks but they are now more stronger and faster in their attacks.
Shadow Port Trickster: A Shadow monster that attacks with lightning in front or summons "totems". The Fire Totem is red and casts a homing fireball that does moderate damage and should be dealt with as soon as possible if placed. The Buff Totem is blue and increases the stats of the mob.
Shadow Port Charger: This is an stronger variant of the Shadow Charger that you have encountered in previous Hamel dungeons. They will use the same attacks but they are now more stronger and faster in their attacks.
Shadow Port Defender: This is an stronger variant of the Shadow Defender that you have encountered in previous Hamel dungeons. They will use the same attacks but they are now more stronger and faster in their attacks.
Shadow Port Sniper: This is an stronger variant of the Shadow Sniper that you have encountered in previous Hamel dungeons. The Sniper has been enhanced where it will aim for its target before firing its laser.
Blood Linker: This is an alternate form of the Shadow Linker. When it links onto you, your attack speed will not be reduced. Instead, the link will only reduce your health.
Mana Linker: This is an alternate form of the Shadow Linker. When it links onto you, your attack speed will not be reduced. Instead, the link will only reduce your mana.
Shadow Linker: A small Shadow monster that can Soul Link just like Shadow Master. Defeat it to prevent or stop the Soul Link. Although easily defeatable, multiple Shadow Linkers can be a pain.
Hagaluz: A spirit that attacks with icicle daggers or by spewing ice (The ice induces Frostbite). When they die a dark eye aura envelopes them. Contact with this aura will induce Curse
Mantares: This is one of the two spiders that you will encounter. It will attack by spewing acid from their mouth that will poison you while hitting you multiple times.
Mantaray: This is the smaller and weaker spider that you will encounter in this dungeon. They will attack mainly with their claws.
Obstacles
Black Flower: Unlike previous dungeons, these plants will now be located on the floor, pointing upwards.
Spider Cocoons: In this dungeon, you will encounter cocoons. You are required to destroy them to advance through the dungeon. After destroying them, either a Mantaray or Mantatres will spawn or you will free a Missing Red Knight.
Ice Rock: Only appears at the passageway to Magmanta's chamber. Falls as players approach.
- As there is a chance of Lavish Gold Boxes and misc. food ingredient drops from these rocks, players with full MP for the boss should pretrigger the rocks by going forward until it shakes, and retreating back to avoid its fall, then collect the items.
Allies
Missing Red Knight: These knights were sent to investigate the cave but were captured by the spiders in the process and sealed in cocoons. If you free them from the cocoons, they will help you fight against the enemies in the dungeon. There will be 2 types of Red Knights, a Lord Knight and a Rune Slayer. You can distinguish which knight is which by observing their attacks.
Moves
The Red Knights are capable to using Elsword's combos and some of his skills.
Lord Knight Skills
- Sonic Blade: They can use Sonic Blade exactly the same way that Elsword can.
- Assault Slash: They can use Assault Slash exactly the same way that Elsword can.
- Fatal Fury: They can use Fatal Fury exactly the same way that Elsword can.
- Stoic: Similar to most bosses, the Red Knights are capable of activating Stoic whenever they are attacked by a certain number of hits.
Rune Slayer Skills
- Rising Slash: They can use Rising Slash exactly the same way that Elsword can.
- Flame Geyser: They can use Flame Geyser exactly the same way that Elsword can.
- Rising Wave: They can perform an enhanced version of Rising Slash where instead of summoning 2 swords on both sides, they can summon 6 swords at the direction that they are facing.
- Stoic: Similar to most bosses, the Red Knights are capable of activating Stoic whenever they are attacked by a certain number of hits.
Miniboss: Giant Hammer Bobosse
You will fight Bobosse on Hard or Very Hard mode.
Moves
- Smash: Bobosse will simply smash his hammer once onto the ground.
- Launcher: Bobosse will swing his hammer twice at you. The second hit will launch you into the air.
- Double Hit: Bobosse will become super-armored and smashes his hammer twice into the ground.
- Quake Smash: Bobosse will jump into the air and as he descends, he will swing his hammer into the ground, which will create a small quake on the ground.
Boss: Magmanta
Moves
- Crippling Cut: Magmanta rises up into the air and crashes into the ground near the player. Can be avoided by waiting in one spot until the monster sign appears above the player's head, and moving quickly out of range.
- Magmanta itself can not harm you. Only the impact of the ground can. Therefore it is easily dodgeable if you are in mid-air
- Lunge: Magmanta will pull back slightly then jump forwards trying to crush anything in front of it.
- Leg Slash: Magmanta will slash you two times with its front legs. It can be interrupted, as it will only super-armor on second slash.
- Quake Smash: Magmanta lifts its front legs and smashes hard into the ground in front of it. Afterwards, rocks will fall from the ceiling and can damage you and Magmanta as well.
- Acid Spray: Magmanta will spray poison at you, which will damage and poison you.
- Bug Bite: Magmanta will lean towards you and will try to bite you in an attempt to damage you.
- Prepare Attack: After Magmanta becomes super-armored after 60 hits, it will retire to the background of the stage, where it cannot be attacked. It will walk around and use Acid Spray towards the player when you are within its range. While Magmanta is in the background, multiple Mantares and Mantaray will drop onto the stage and will try to attack you. After using Acid Spray 3 times, or after a set duration, it will return to the map by using Crippling Cut.
- Pheromone: After reducing Magmanta's health to less than 1/4, it will begin releasing red smoke, which continuously summons more Mantares and Mantaray into battle. Once Magmanta reaches this stage, it can no longer use Prepare Attack.
Strategies
- Magmanta has absolute immunity to Water elements. You will not be able to inflict Frostbite, Freezing, or Frozen from skills.
- All of Magmanta's moves (except for Crippling Cut and Lunge) will send it into stoic (super armor) state at some point of the attack, which can be seen by it having a red outline.
- When it does, everyone in the party should skill immediately to skill lock it and deal damage enough for it to skip its retreat HP markers.
- Failing to do so will result in the Magmanta's routine jumping after certain HP points which annoys players and leads to time wastage and a poor dungeon rank.
- Pheromone always activates at 7 HP bars. Do not waste your MP on special actives (unless they are of extremely quick DPS) when Magmanta's HP is nearing this point as it will become invincible when it uses the skill.
- Examples of moves that do not have sufficient DPS include Nuclear and Junk Break.
Boss Drops
| Image | Name | Class | Stats |
|---|---|---|---|
 |
Bobosse's Basher |
Elsword |
Lv58 Weapon: Physical Attack +4312 Magical Attack +3631 Max HP +874 Critical Hit Rate +5% Action Speed +4% Accuracy +2% Water Element Resistance +40 Dropped by Miniboss "Giant Hammer Bobosse" |
 |
Bobosse's Devil Punisher |
Chung |
Lv58 Weapon: Physical Attack +4228 Magical Attack +3717 Max HP +1311 Critical Hit Rate +5% Action Speed +4% Accuracy +2% Water Element Resistance +40 Dropped by Miniboss "Giant Hammer Bobosse" |
 |
Magmanta's Arachni |
Rena |
Lv58 Weapon: Physical Attack +3769 Magical Attack +4268 Max HP +1602 Critical Hit Rate +5% Action Speed +4% Accuracy +2% Water Element Resistance +40 |
 |
Magmanta's Spider Drone |
Eve |
Lv58 Weapon: Physical Attack +3694 Magical Attack +4111 Max HP +1311 Critical Hit Rate +5% Action Speed +4% Accuracy +2% Water Element Resistance +40 |
 |
Magmanta's Fang |
Common |
Face Accessory (Middle): Critical Hit Rate +1% Action Speed +1% |
Set Equipment
Magmanta (Boss)
- Twisted Wind Top Piece
- Bizarre Chaos Top Piece
- Bizarre Chaos Gloves
Trivia
- Strangely, despite Magmanta's massive size and weight, it does not fracture the ice when it uses Crippling Cut and does not fall into the water during Prepare Attack. This is likely because its weight is spread over 6 legs.
Gallery
-
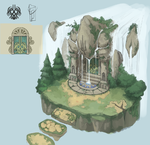
Water Temple Entrance Concept Art
-
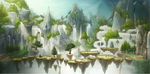
Water Temple Entrance Concept Art 2
-
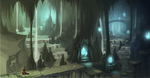
Water Temple Entrance Concept Art 3


