Sea of Ruin/pt-br: Difference between revisions

From Elwiki
(Created page with "={{{DunName|}}}= {{#if:{{{Quotation|}}}| <center>{{quotation|{{{Quotation|}}}}}</center> |}} <div class="section-wrapper" style="border-color: {{{Color|}}};">{{#if:{{{Descript...")
 
m (Text replacement - "<span style="display:none">{{</span>" to "<dfn>{{</dfn>")
 
(3 intermediate revisions by 2 users not shown)
Line 1: Line 1:
={{{DunName|}}}=
{{Languages|Sea of Ruin}}
{{#if:{{{Quotation|}}}|
{{DISPLAYTITLE: Mar da Ruína}}
<center>{{quotation|{{{Quotation|}}}}}</center>
{{DungeonPage/pt-br
|}}
| Orient=3
<div class="section-wrapper" style="border-color: {{{Color|}}};">{{#if:{{{Description|}}}|
| Color={{ColorSel|Village|14}}
{{Section
| DunButton=13-1Button.png
| SectionSty=text-align: center;
| SmallPic=13-1.png
| Color0={{{Color|}}}
| BigPic=14-1new2.png
| Title0=Description
| DunName=Mar da Ruína
| Content0={{{Description|}}}
| Quotation=Uma visita mais familiar.No entanto,algo diferente está flutuando entre o caos.
}}|}}
| Description=O Grupo de Busco do El está de volta ao Reino de Henir. Mas algo está à espreita na sombra para bloquear seu caminho...
{| class="section-side-column"
| LvNeed=99
| {{#if:{{{LvFitHell|}}}|{{tabs|divclass=forceland|name=p|tab1=Normal Mode|contents1=[[File:{{{BigPic|}}}{{!}}600px]] |tab2=Hell Mode|contents2=[[File:{{{BigPic2|}}}{{!}}600px]]}}|{{#if:{{{BigPic2|}}}|{{tabs|divclass=forceland|name=p|tab1=Bethma|contents1=[[File:{{{BigPic|}}}{{!}}600px]] |tab2=Altera|contents2=[[File:{{{BigPic2|}}}{{!}}600px]]}}|[[File:{{{BigPic|}}}|600px]]}}}}
| LvFit=270000
| Detail=<dfn>{{</dfn>
====Debuff Ambiental - Reino Demoníaco (Adaptabilidade)====
*O Poder do El não chega a este Reino, Ataque e HP serão reduzidos em 50%.
<dfn>}}</dfn>
| DunMap=[[File:13-1map.png]]
| Mob=<dfn>{{</dfn>
|[[File:13-1 Mob 1.png|60px]]
|'''Círculo do Caos''' - Uma Forma de vida Geométrica abstrata de Henir Composta por um arranjo Circular de Retângulos.
|
|
{{Section
*'''Warp Cycle:''' Teletransporta-se ao lado de um jogador. Estende sua Geometria e gira em um Círculo Vertical. Esses golpes derrubarão os Jogadores.
| SectionSty=height: 50%;
*'''Gyro Blade:''' Estende sua Geometria e gire Horizontalmente, fazendo golpes Contínuos.
| Color0={{{Color|}}}
'''Observação:'''
| Title0=Recommended Level
*Se isso for convocado para o campo, Causará dano aos jogadores próximos ao Pousar.
| Content0={{{LvNeed|}}}
|-
|[[File:13-1 Mob 2.png|60px]]
| '''Chaos Square''' - An abstract geometric Henir life form comprised of several pentagons. This creature is stationary and will attack at range.
|
*'''Space Distortion:''' Cast a pentagon on top of players which deals damage.
'''Note:'''
*Unlike its [[Labyrinth of Ruin]] counterpart, this version can sometimes be pushed by attacks as opposed to being immovable.
*If this is summoned onto the field, it will deal damage to nearby players upon landing.
<dfn>}}</dfn>
| MiniBoss=<dfn>{{</dfn>
|-
|[[File:12-1BossHead.png|60px]]
| '''Chaos Leviathan''' - A whale like life form which dwells in the realm of Henir.
|
*'''Tail Swipe:''' Swing its entire body around, swiping with its tail.
*'''Tail Slam:''' Swing its tail downwards, attacking anybody behind it.
*'''Tackle Assault:''' Fly out and ready itself on one of the two sides of the map, it will then tackle from one side of it to the other.
*'''Hyper Beam:''' Charge energy then fire a large laser forwards, dealing massive damage.
'''Note:'''
*The miniboss has perpetual '''Super Armor'''.
**The boss will have '''[[Status_Effects#Unique_Status_Effects|Hyper Armor]]''' when it turns around.
<dfn>}}</dfn>
| Obstacle=<dfn>{{</dfn>
|[[File:13-1 Obstacle 1.png|60px]]
|'''Launch Pads''' - Platforms which quickly propel players into higher areas of the stage.
|-
|[[File:13-1 Obstacle 2.png|60px]]
|'''Portal''' - This portal doesn't attack you, it transports you to a different part of the stage.
|-
|[[File:13-1 Obstacle 3.png|60px]]
|'''Moving Platforms''' - Platforms that will automatically move back and forth.
|-
|[[File:Water.png|60px]]
|'''Water''' - After exiting Henir's passage you're teleported deep underwater, while submerged movements and attacks will be slowed down exponentially as well as jump height being increased significantly. While underwater an oxygen meter will appear above the player and once depleted will cause the character to drown.
|-
|[[File:13-1 Obstacle 4.png|60px]]
|'''Air Geysers''' - While fighting the boss, air geysers will shoot out of the ground, sending you propel you very high up. These are you only method of restoring oxygen while fighting the boss. The geysers will also cancel any animation you're currently performing, including skills.
<dfn>}}</dfn>
| Boss=<dfn>{{</dfn>
|-
|[[File:13-1 Boss.png|60px]]
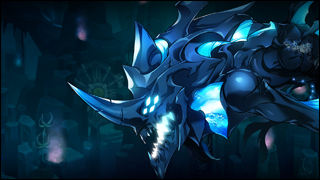
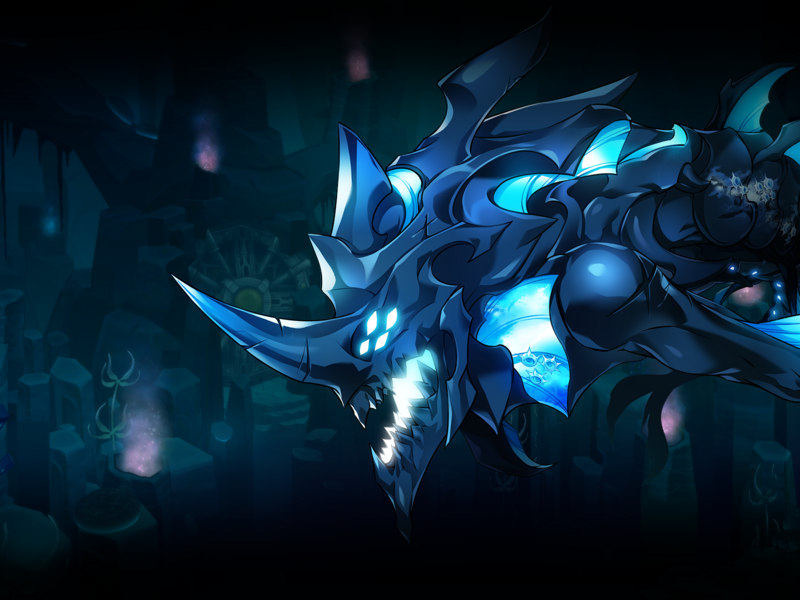
| '''Leviathan''' - A ravenous sea creature encountered immediately upon exiting the Henir passage.
|
*'''Tail Whip:''' Raise its tail when swipe in a circle.
*'''Water Jet:''' Quickly charge energy in its mount, then it will quickly fire a water beam down, pulling its head upwards.
*'''Charge:''' Swim in a circle then charge forwards to the other side of the map, dealing continuous hits.
*'''Cyclone Trap:''' The Leviathan will go to the center of the map and create two tall water cyclones at the ends of the map. They will slowly close in till they reach the center of the map. An Air geyser will appear during this which you can you to jump over the cyclones.
*'''Vortex Spiral:''' The Leviathan will swim out of screen, the floor will erupt in small geysers which launch you up, two blue lines will appear indicating the area Leviathan will attack. It will then swim upwards in a spiral fashion creating a vortex pillar that deals heavy damage.
<dfn>}}</dfn>
| BDrop={{:13-1Bdrop1}}
| SBGM=[http://www.youtube.com/watch?v=ITzpEdLH4hU '''''li_devildom1_henir_02''''']
 
[http://www.youtube.com/watch?v=LSxYAOVOS10 '''''li_devildom1_henir_boss_02''''']
|Gallery=
<gallery widths=150px heights=150px>
File:Sea of Ruin 1.png
File:Sea of Ruin 2.png
File:Sea of Ruin 5.png
File:Sea of Ruin 3.png
File:Sea of Ruin 4.png
File:13-1new.png|Old loading image.
</gallery>
| Dialogue=
{{tabs
|name=Dialog
|tab1=Dungeon Start Dialogue
|contents1=
*{{StoryIcon|RH}} '''Raven:''' ''It's different from last time. We better be on our guard.''
|tab2=Mid Dungeon Dialogue
|contents2=
*{{StoryIcon|Aps}} '''Ara:''' ''Over there! The dimensional rift is opening!''
----
*{{StoryIcon|RaS}} '''Laby:''' ''Oiii!!''
*{{StoryIcon|KE}} '''Elsword:''' ''Who...?''
*{{StoryIcon|CEs}} '''Eve:''' ''This whole area is turning into a dimensional rift! Be careful!''
|tab3=Dungeon Victory Quote
|contents3=
*'''Elsword:''' ''(The vision... I hope that was the end of it...)''
*'''Aisha:''' ''That whale... It looks similar to the one we saw in Henir's Realm...''
*'''Rena:''' ''This wasn't too difficult compared to what we went through in Varnimyr... But everyone looks exhausted from the constant battle.''
*'''Raven:''' ''Chaos... And now the deep-sea. It's troublesome to react with the environment changing so quickly.''
*'''Eve:''' ''The dimensional rift connected to the deep-sea... Perhaps the monsters in Henir's Realm are those deep-sea monsters being corroded by Henir.''
*'''Chung:''' ''Back in the Demon Realm... Perhaps... No, I should focus on what's happening now.''
*'''Ara:''' ''Aisha's Magic is amazing! I was never able to move so swiftly under water!''
*'''Elesis:''' ''We weren't able to rest since coming to the Demon Realm. I hope we had some time to get reorganized.''
*'''Add:''' ''(Henir... Is this the power that defies all laws of physics? Tsk, those who studied this are all mad.)''
*'''Lu:''' ''This familiar feeling... I didn't think I'll be back here like this.''
*'''Ciel:''' ''This proves that this passage is more dangerous than it's worth. We should look for another way next time.''
*'''Rose:''' ''I do not specialize in under water warfare, but I have no problem taking care of the monsters here.''
*'''Ain:''' ''(A dimension rift... At least we weren't separated into different dimensions.)''
*'''Laby:''' ''You're the El Search Party? Hehee! Nice to meet you! I'm Laby! This is Nisha!''
}}
|Trivia=<dfn>{{</dfn>
*The dungeon focuses heavily on vertical map traversal, more so than any dungeon before it. As such, bringing skills that have a lot of height like [[Electronic Fall]] or [[Everybody, Punch]] is advised.
<dfn>}}</dfn>
|Updates=<dfn>{{</dfn>
{| cellpadding="5" border="1" style="border-collapse: collapse; text-align: center;"
|- style="background:{{ColorSel|Village|14}}" class="textfloat"
! colspan=2 | Date !! rowspan=2 | Changes
|- style="background:{{ColorSel|Village|14}}" class="textfloat"
! KR !! NA
|-
| 07/18/2019 || 08/14/2019 || align="left" |
*'''Sea of Ruin''' added.
|-
| 10/10/2019 || - || align="left" |
*CP Requirement increased from 350000 to 370000.
|-
| 11/21/2019 || - || align="left" |
*CP Requirement decreased from 370000 to 270000.
*Difficulty decreased.
|-
| 03/12/2020 || 04/08/2020 || align="left" |
*Difficulty decreased.
|}
<dfn>}}</dfn>
|AltLang=
{{AlternateLanguages
|Color={{ColorSel|Village|14}}
|KR=소멸의 바다|KRName=Sea of Extinction
|BR=Mar de Ruína |BRName=Sea of Ruin
|DE=Meer des Ruins |DEName=Sea of Ruin
|ES=Mar de la Ruina |ESName=Sea of Ruin
|FR=Mer de ruines |FRName=Sea of Ruin
|IT=Mare della rovina |ITName=Sea of Ruin
|PL=Morze Ruiny |PLName=Sea of Ruin
}}
}}
{{Section
| SectionSty=height: 50%;
| Color0={{{Color|}}}
| Title0={{#if:{{{LvFit|}}}|Required Combat Power|Appropriate Item Level}}
| Content0={{#if:{{{LvFitHell|}}}|{{tabs|divclass=forceland|name=x|tab1=Normal Mode|contents1={{{LvFit|}}}|tab2=Hell Mode|contents2={{{LvFitHell|}}}}}|{{#if:{{{LvFitStory|}}}|{{tabs|divclass=forceland|name=x|tab1=Story Mode|contents1={{{LvFitStory|}}}|tab2=Normal Mode|contents2={{{LvFit|}}}}}|{{{LvFit|}}}}}}}{{{LvFit2|}}}
}}
}}
|}{{#if:{{{XEntryReq|}}}|
{{Section
| Color0={{{Color|}}}
| Title0=Entry Requirements
| Content0={{{XEntryReq|}}}
}}|}}{{#if:{{{DunMap|}}}|
{{Section
| SectionSty=text-align: center;
| Title0=Dungeon Layout
| Color0={{{Color|}}}
| Content0={{{DunMap|}}}
}}|}}{{#if:{{{Detail|}}}|
{{Section
| Title0=Details
| Color0={{{Color|}}}
| Content0={{{Detail|}}}
}}|}}{{#if:{{{Ally|}}}|
{{Section
| Color0={{{Color|}}}
| Title0=Ally{{#ifeq:{{{Ally_KROnly}}}|true| (KR Only)|}}
| Content0=<span style="display:none">{{</span>
  {| border="1px" cellpadding="5px" style="border-spacing: 0; border: 1px #000 solid; border-collapse: collapse; width: 100%; vertical-align: top;"
  |-
  ! width="60px" | Ally Image
  ! {{#ifeq:{{{AllyATK}}}|true|width="350px"|}} | Ally Description
  {{#ifeq:{{{AllyATK}}}|true|! Ally Moves|}}
  |-
  {{{Ally|}}}
  |}
<span style="display:none">}}</span>
}}|}}{{#if:{{{Mob|}}}|
{{Section
| Color0={{{Color|}}}
| Title0=Mobs
| Content0=<span style="display:none">{{</span>
  {| border="1px" cellpadding="5px" style="border-spacing: 0; border: 1px #000 solid; border-collapse: collapse; width: 100%; vertical-align: top;"
  |-
  ! width="60px" | Monster Image
  ! width="350px" | Monster Description
  ! Monster Moves
  |-
  {{{Mob|}}}
  |}
<span style="display:none">}}</span>
}}|}}{{#if:{{{BethmaMob|}}}|
{{Section
| Color0={{ColorSel|Village|3}}
| Title0=Bethma Mobs
| Content0=<span style="display:none">{{</span>
  {| border="1px" cellpadding="5px" style="border-spacing: 0; border: 1px #000 solid; border-collapse: collapse; width: 100%; vertical-align: top;"
  |-
  ! width="60px" | Monster Image
  ! width="350px" | Monster Description
  ! Monster Moves
  |-
  {{{BethmaMob|}}}
  |}
<span style="display:none">}}</span>
}}|}}{{#if:{{{AlteraMob|}}}|
{{Section
| Color0={{ColorSel|Village|4}}
| Title0=Altera Mobs
| Content0=<span style="display:none">{{</span>
  {| border="1px" cellpadding="5px" style="border-spacing: 0; border: 1px #000 solid; border-collapse: collapse; width: 100%; vertical-align: top;"
  |-
  ! width="60px" | Monster Image
  ! width="350px" | Monster Description
  ! Monster Moves
  |-
  {{{AlteraMob|}}}
  |}
<span style="display:none">}}</span>
}}|}}{{#if:{{{Start|}}}|
{{Section
| Color0={{{Color|}}}
| Title0=Hall of El - Beginning
| Content0=<span style="display:none">{{</span>
  {| border="1px" cellpadding="5px" style="border-spacing: 0; border: 1px #000 solid; border-collapse: collapse; width: 100%; vertical-align: top;"
  |-
  ! width="60px" | Monster Image
  ! width="350px" | Shadow Description
  ! Shadow Moves
  |-
  {{{Start|}}}
  |}
<span style="display:none">}}</span>
}}|}}{{#if:{{{Trial|}}}|
{{Section
| Color0={{{Color|}}}
| Title0=Hall of El - Trials
| Content0=<span style="display:none">{{</span>
  {| border="1px" cellpadding="5px" style="border-spacing: 0; border: 1px #000 solid; border-collapse: collapse; width: 100%; vertical-align: top;"
  |-
  ! width="60px" | Monster Image
  ! width="350px" | Shadow Description
  ! Shadow Moves
  |-
  {{{Trial|}}}
  |}
<span style="display:none">}}</span>
}}|}}{{#if:{{{Choice|}}}|
{{Section
| Color0={{{Color|}}}
| Title0=Hall of El - Choice
| Content0=<span style="display:none">{{</span>
  {| border="1px" cellpadding="5px" style="border-spacing: 0; border: 1px #000 solid; border-collapse: collapse; width: 100%; vertical-align: top;"
  |-
  ! width="60px" | Monster Image
  ! width="350px" | Shadow Description
  ! Shadow Moves
  |-
  {{{Choice|}}}
  |}
<span style="display:none">}}</span>
}}|}}{{#if:{{{General|}}}|
{{Section
| Color0={{{Color|}}}
| Title0=General
| Content0=<span style="display:none">{{</span>
  {| border="1px" cellpadding="5px" style="border-spacing: 0; border: 1px #000 solid; border-collapse: collapse; width: 100%; vertical-align: top;"
  |-
  ! width="60px" | Monster Image
  ! width="350px" | General Description
  ! General Moves
  |-
  {{{General|}}}
  |}
<span style="display:none">}}</span>
}}|}}{{#if:{{{MiniBoss|}}}|
{{Section
| Color0={{{Color|}}}
| Title0=Mini Boss{{#ifeq:{{{MiniBoss_KROnly}}}|true| (KR Only)|}}
| Content0=<span style="display:none">{{</span>
  {| border="1px" cellpadding="5px" style="border-spacing: 0; border: 1px #000 solid; border-collapse: collapse; width: 100%; vertical-align: top;"
  |-
  ! width="60px" | Monster Image
  ! width="350px" | Boss Description
  ! Boss Moves
  |-
  {{{MiniBoss|}}}
  |}
<span style="display:none">}}</span>
}}|}}{{#if:{{{Shadows|}}}|
{{Section
| Color0={{{Color|}}}
| Title0=Trial of Shadows
| Content0=<span style="display:none">{{</span>
  {| border="1px" cellpadding="5px" style="border-spacing: 0; border: 1px #000 solid; border-collapse: collapse; width: 100%; vertical-align: top;"
  |-
  ! width="60px" | Monster Image
  ! width="350px" | Shadow Description
  ! Shadow Moves
  |-
  {{{Shadows|}}}
  |}
<span style="display:none">}}</span>
}}|}}{{#if:{{{Potions|}}}|
{{Section
| Color0={{{Color|}}}
| Title0=Potions
| Content0={{{Potions|}}}
}}|}}{{#if:{{{Buffs|}}}|
{{Section
| Color0={{{Color|}}}
| Title0=Buffs
| Content0=<span style="display:none">{{</span>
  {| border="1px" cellpadding="5px" style="border-spacing: 0; border: 1px #000 solid; border-collapse: collapse; width: 100%; vertical-align: top;"
  |-
  ! width="60px" | Buffs Image
  ! Buffs Description
  |-
  {{{Buffs|}}}
  |}
<span style="display:none">}}</span>
}}|}}{{#if:{{{Obstacle|}}}|
{{Section
| Color0={{{Color|}}}
| Title0=Obstacles{{#ifeq:{{{Obstacle_KROnly}}}|true| (KR Only)|}}
| Content0=<span style="display:none">{{</span>
  {| border="1px" cellpadding="5px" style="border-spacing: 0; border: 1px #000 solid; border-collapse: collapse; width: 100%; vertical-align: top;"
  |-
  ! width="60px" | Obstacles Image
  ! Obstacles Description
  |-
  {{{Obstacle|}}}
  |}
<span style="display:none">}}</span>
}}|}}{{#if:{{{Boss|}}}|
{{Section
| Color0={{{Color|}}}
| Title0=Boss
| Content0=<span style="display:none">{{</span>
  {| border="1px" cellpadding="5px" style="border-spacing: 0; border: 1px #000 solid; border-collapse: collapse; width: 100%; vertical-align: top;"
  |-
  ! width="60px" | Monster Image
  ! width="350px" | Boss Description
  ! Boss Moves
  |-
  {{{Boss|}}}
  |}
<span style="display:none">}}</span>
}}|}}{{#if:{{{BethmaBoss|}}}|
{{Section
| Color0={{ColorSel|Village|3}}
| Title0=Bethma Boss
| Content0=<span style="display:none">{{</span>
  {| border="1px" cellpadding="5px" style="border-spacing: 0; border: 1px #000 solid; border-collapse: collapse; width: 100%; vertical-align: top;"
  |-
  ! width="60px" | Monster Image
  ! width="350px" | Boss Description
  ! Boss Moves
  |-
  {{{BethmaBoss|}}}
  |}
<span style="display:none">}}</span>
}}|}}{{#if:{{{AlteraBoss|}}}|
{{Section
| Color0={{ColorSel|Village|4}}
| Title0=Altera Boss
| Content0=<span style="display:none">{{</span>
  {| border="1px" cellpadding="5px" style="border-spacing: 0; border: 1px #000 solid; border-collapse: collapse; width: 100%; vertical-align: top;"
  |-
  ! width="60px" | Monster Image
  ! width="350px" | Boss Description
  ! Boss Moves
  |-
  {{{AlteraBoss|}}}
  |}
<span style="display:none">}}</span>
}}|}}{{#if:{{{Helpful|}}}|
{{Section
| Color0={{{Color|}}}
| Title0=Helpful Skills
| Content0={{{Helpful|}}}
}}|}}{{#if:{{{Dialogue|}}}|
{{Section
| Color0={{{Color|}}}
| Title0=Dialogue
| Content0={{{Dialogue|}}}
}}|}}{{#if:{{{XSet|}}}|
{{Section
| Color0={{{Color|}}}
| Title0=Secret Set
| Content0={{{XSet|}}}
}}|}}{{#if:{{{YSet|}}}|
{{Section
| Color0={{{Color|}}}
| Title0=Legendary Weapon
| Content0={{{YSet|}}}
}}|}}{{#if:{{{Reward|}}}|
{{Section
| Color0={{{Color|}}}
| Title0=Reward
| Content0={{{Reward|}}}
}}|}}
{{Section
| Color={{{Color|}}}
| hStyle1={{#if:{{{BDrop|}}}{{{SBDrop|}}}||border-left: none;}}
| Style1=text-align: center;{{#if:{{{BDrop|}}}{{{SBDrop|}}}|border-left: 1px #000 solid;|}}
| Title0={{#if:{{{BDrop|}}}|[[Boss Drops]]|}}{{#if:{{{SBDrop|}}}|Boss Drops|}}
| Title1=[[Soundtrack|BGM]]
| Width0=70%
| Content0=<span style="display:none">{{</span>
{{{BDrop|}}}{{{SBDrop|}}}
<span style="display:none">}}</span>
| Content1=<span style="display:none">{{</span>
{{#if:{{{SBGM|}}}|{{{SBGM|}}}|}}
{{#if:{{{DBGM|}}}|
=== Dungeon ===
{{{DBGM|}}}|}}
{{#if:{{{DLBGM|}}}|
=== Luto Mode ===
{{{DLBGM|}}}|}}
{{#if:{{{BBGM|}}}|
=== Boss ===
{{{BBGM|}}}|}}
{{#if:{{{BLBGM|}}}|
=== Luto Boss ===
{{{BLBGM|}}}|}}
<span style="display:none">}}</span>
}}{{#if:{{{Gallery|}}}|
{{Section
| Color0={{{Color|}}}
| Title0=Gallery
| Content0={{{Gallery|}}}
}}|}}{{#if:{{{Video|}}}|
{{Section
| SectionSty=text-align: center;
| Color0={{{Color|}}}
| Title0=Videos
| Content0=<span style="display:none">{{</span>
{{{Video|}}}
<span style="display:none">}}</span>
}}|}}{{#if:{{{Trivia|}}}|
{{Section
| Color0={{{Color|}}}
| Title0=Trivia
| Content0={{{Trivia|}}}
}}|}}{{#if:{{{Updates|}}}|
{{Section
| Color0={{{Color|}}}
| Title0=Updates
| Content0={{{Updates|}}}
}}|}}{{#if:{{{AltLang|}}}|
{{Section
| Color0={{{Color|}}}
| Title0=Alternative Names
| Content0=<span style="display:none">{{</span>
{{{AltLang|}}}
<span style="display:none">}}</span>
}}|}}
</div>
<br>
{{Dungeons|name=a|Orient={{{Orient|}}}}}{{Hunting Fields|name=b|Orient={{{Orient|}}}}}
</includeonly>

Latest revision as of 18:26, 3 May 2022

Mar da Ruína

Uma visita mais familiar.No entanto,algo diferente está flutuando entre o caos.
Descrição
O Grupo de Busco do El está de volta ao Reino de Henir. Mas algo está à espreita na sombra para bloquear seu caminho...
Nível Recomendado
99
Poder de Combate Requisitado
270000
Visual do Calabouço
Detalhes
{{

Debuff Ambiental - Reino Demoníaco (Adaptabilidade)

  • O Poder do El não chega a este Reino, Ataque e HP serão reduzidos em 50%.
}}
Mobs
{{ {{
Imagem dos Monstros Descrição dos Monstros Movimentos dos Monstros
Círculo do Caos - Uma Forma de vida Geométrica abstrata de Henir Composta por um arranjo Circular de Retângulos.
  • Warp Cycle: Teletransporta-se ao lado de um jogador. Estende sua Geometria e gira em um Círculo Vertical. Esses golpes derrubarão os Jogadores.
  • Gyro Blade: Estende sua Geometria e gire Horizontalmente, fazendo golpes Contínuos.

Observação:

  • Se isso for convocado para o campo, Causará dano aos jogadores próximos ao Pousar.
Chaos Square - An abstract geometric Henir life form comprised of several pentagons. This creature is stationary and will attack at range.
  • Space Distortion: Cast a pentagon on top of players which deals damage.

Note:

  • Unlike its Labyrinth of Ruin counterpart, this version can sometimes be pushed by attacks as opposed to being immovable.
  • If this is summoned onto the field, it will deal damage to nearby players upon landing.

}}

}}
Mini-Chefe
{{ {{
Imagem do Monstro Descrição do Chefe Movimentos do Chefe
Chaos Leviathan - A whale like life form which dwells in the realm of Henir.
  • Tail Swipe: Swing its entire body around, swiping with its tail.
  • Tail Slam: Swing its tail downwards, attacking anybody behind it.
  • Tackle Assault: Fly out and ready itself on one of the two sides of the map, it will then tackle from one side of it to the other.
  • Hyper Beam: Charge energy then fire a large laser forwards, dealing massive damage.

Note:

  • The miniboss has perpetual Super Armor.

}}

}}
Obstacles
{{ {{
Imagem do Obstáculo Descrição do Obstáculo
Launch Pads - Platforms which quickly propel players into higher areas of the stage.
Portal - This portal doesn't attack you, it transports you to a different part of the stage.
Moving Platforms - Platforms that will automatically move back and forth.
Water - After exiting Henir's passage you're teleported deep underwater, while submerged movements and attacks will be slowed down exponentially as well as jump height being increased significantly. While underwater an oxygen meter will appear above the player and once depleted will cause the character to drown.
Air Geysers - While fighting the boss, air geysers will shoot out of the ground, sending you propel you very high up. These are you only method of restoring oxygen while fighting the boss. The geysers will also cancel any animation you're currently performing, including skills.

}}

}}
Chefe
{{ {{
Imagem do Monstro Descrição do Chefe Movimentos do Chefe
Leviathan - A ravenous sea creature encountered immediately upon exiting the Henir passage.
  • Tail Whip: Raise its tail when swipe in a circle.
  • Water Jet: Quickly charge energy in its mount, then it will quickly fire a water beam down, pulling its head upwards.
  • Charge: Swim in a circle then charge forwards to the other side of the map, dealing continuous hits.
  • Cyclone Trap: The Leviathan will go to the center of the map and create two tall water cyclones at the ends of the map. They will slowly close in till they reach the center of the map. An Air geyser will appear during this which you can you to jump over the cyclones.
  • Vortex Spiral: The Leviathan will swim out of screen, the floor will erupt in small geysers which launch you up, two blue lines will appear indicating the area Leviathan will attack. It will then swim upwards in a spiral fashion creating a vortex pillar that deals heavy damage.

}}

}}
Dialogo
  • Raven: It's different from last time. We better be on our guard.
Boss DropsBGM
{{
Image Name Boss Character Stats
Leviathan Fragment
Leviathan Fragment
Leviathan
Common

Accessory (Earring):
When your HPs are below 30%, +5% All Skill Damage.

}}
{{

li_devildom1_henir_02

li_devildom1_henir_boss_02


}}
Gallery
Trivia
{{
  • The dungeon focuses heavily on vertical map traversal, more so than any dungeon before it. As such, bringing skills that have a lot of height like Electronic Fall or Everybody, Punch is advised.
}}
Nomes Alternativos
{{
Server Name Translation
South Korea 소멸의 바다 Sea of Extinction
Germany Meer des Ruins Sea of Ruin
Spain Mar de la Ruina Sea of Ruin
France Mer de ruines Sea of Ruin
Italy Mare della rovina Sea of Ruin
Poland Morze Ruiny Sea of Ruin
Brazil Mar de Ruína Sea of Ruin
}}


  • Region 13~18
  • Region 1~6
  • Region 7~12
  • Region 19~20
  • Laby
  • Noah
  • Lithia
  • Other
  • Miscellaneous